Looking for more apple pie recipes? Try my old-fashioned apple pie or this dutch apple crumb pie! This post was originally published in 2010. The images and recipe tips have been updated in 2021.
These Apple Pie Bars Have a Secret Ingredient…Why I Love These Apple Pie BarsWhat You’ll NeedHow to Make Apple Pie BarsTips for SuccessHow to Store and Reheat LeftoversCan I Freeze These?Get the Recipe
These Apple Pie Bars Have a Secret Ingredient…
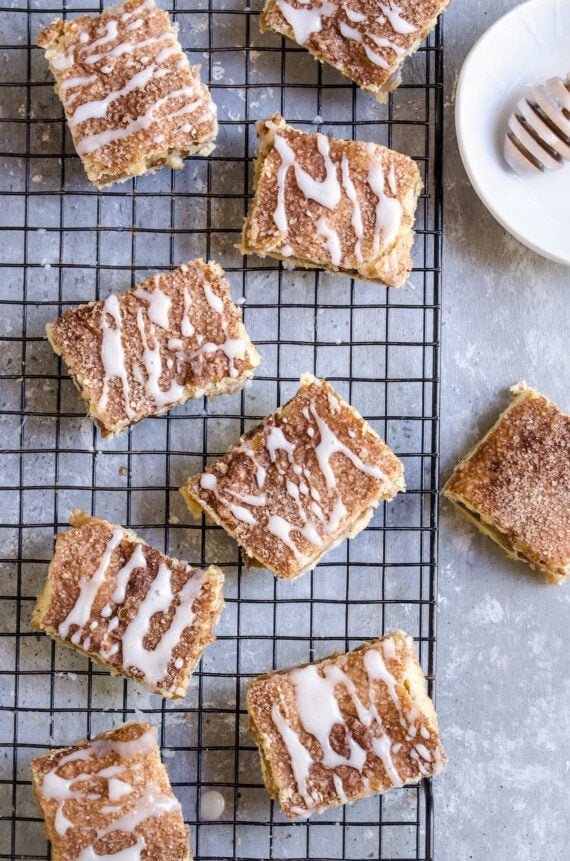
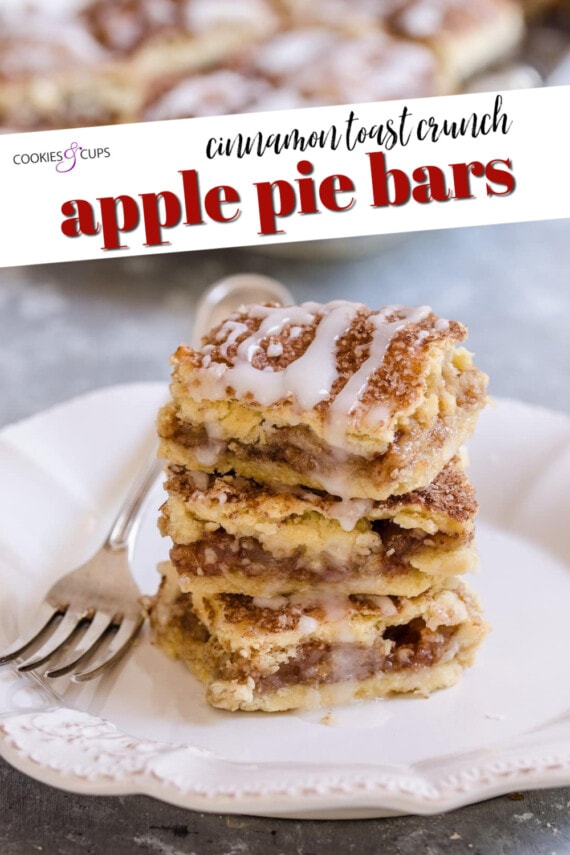
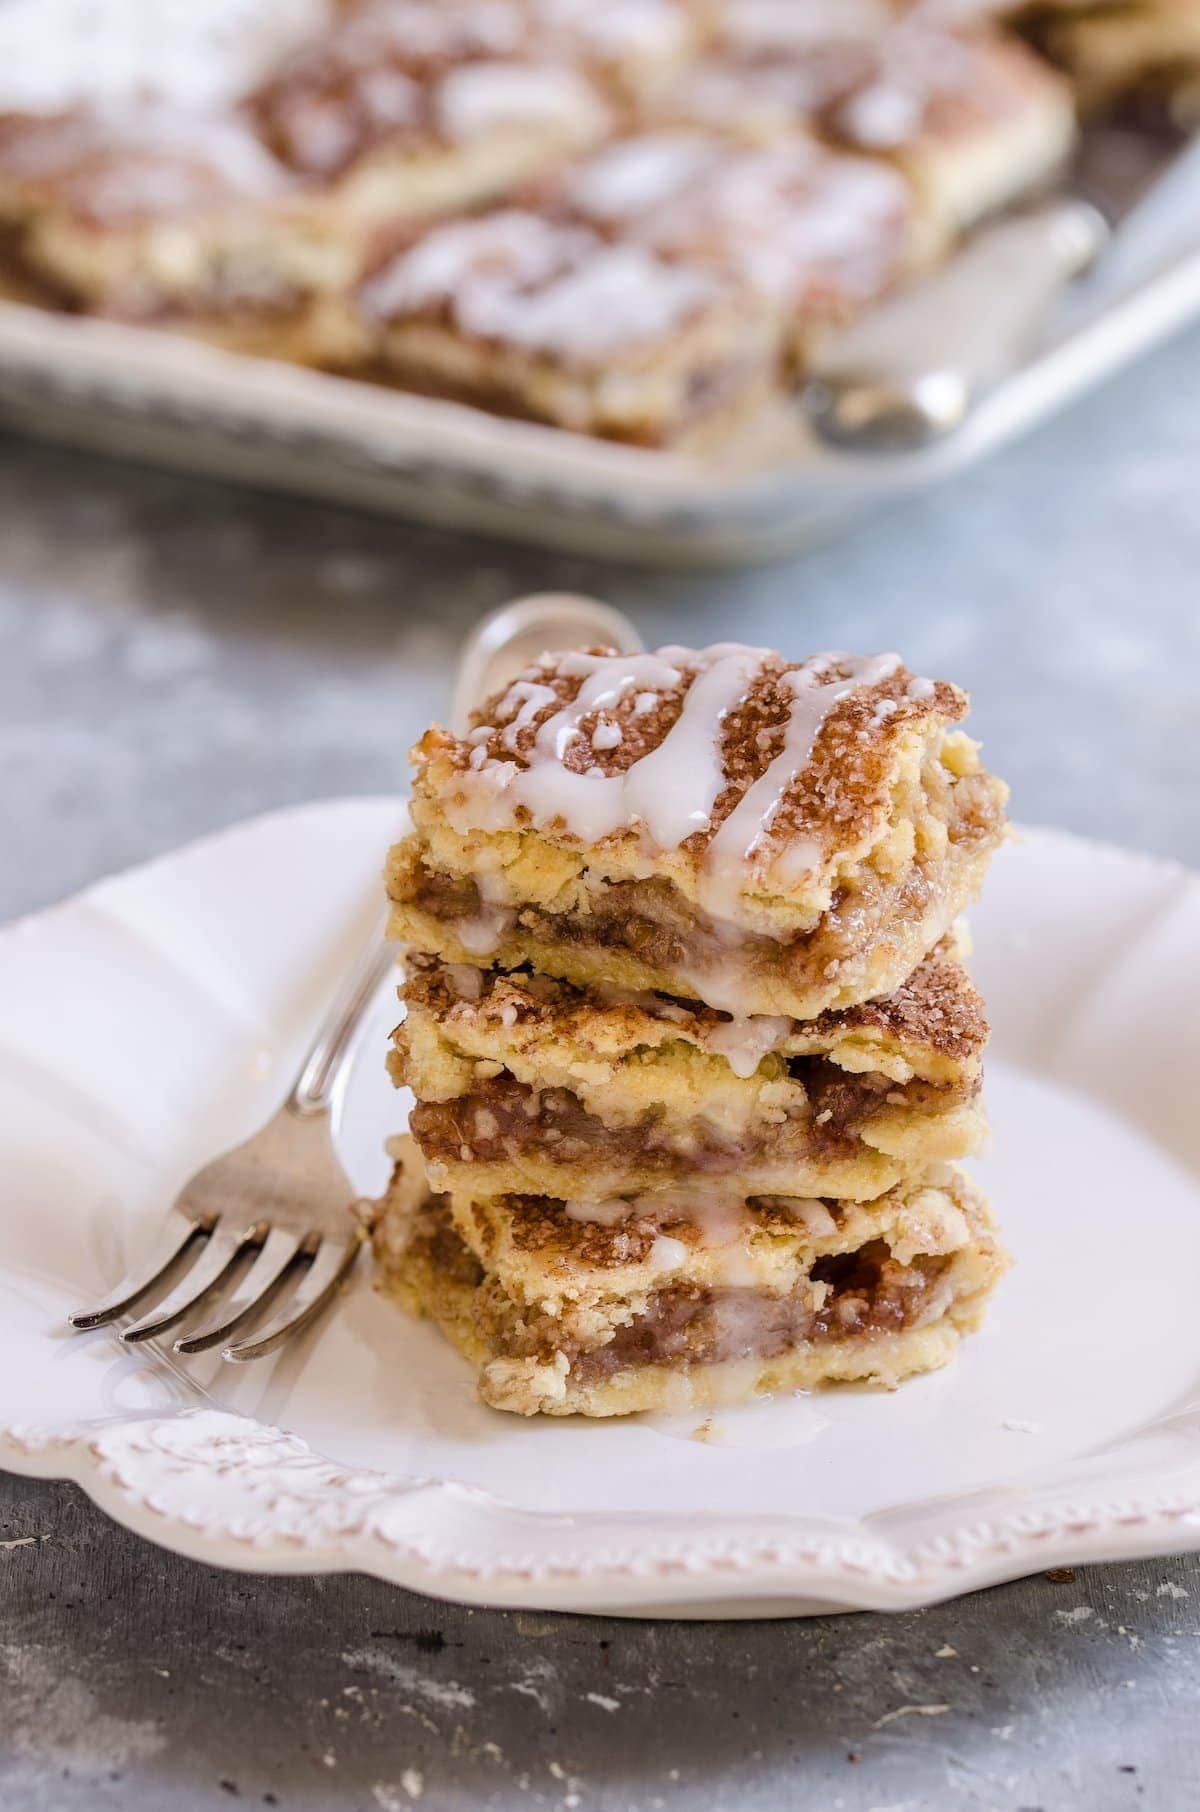
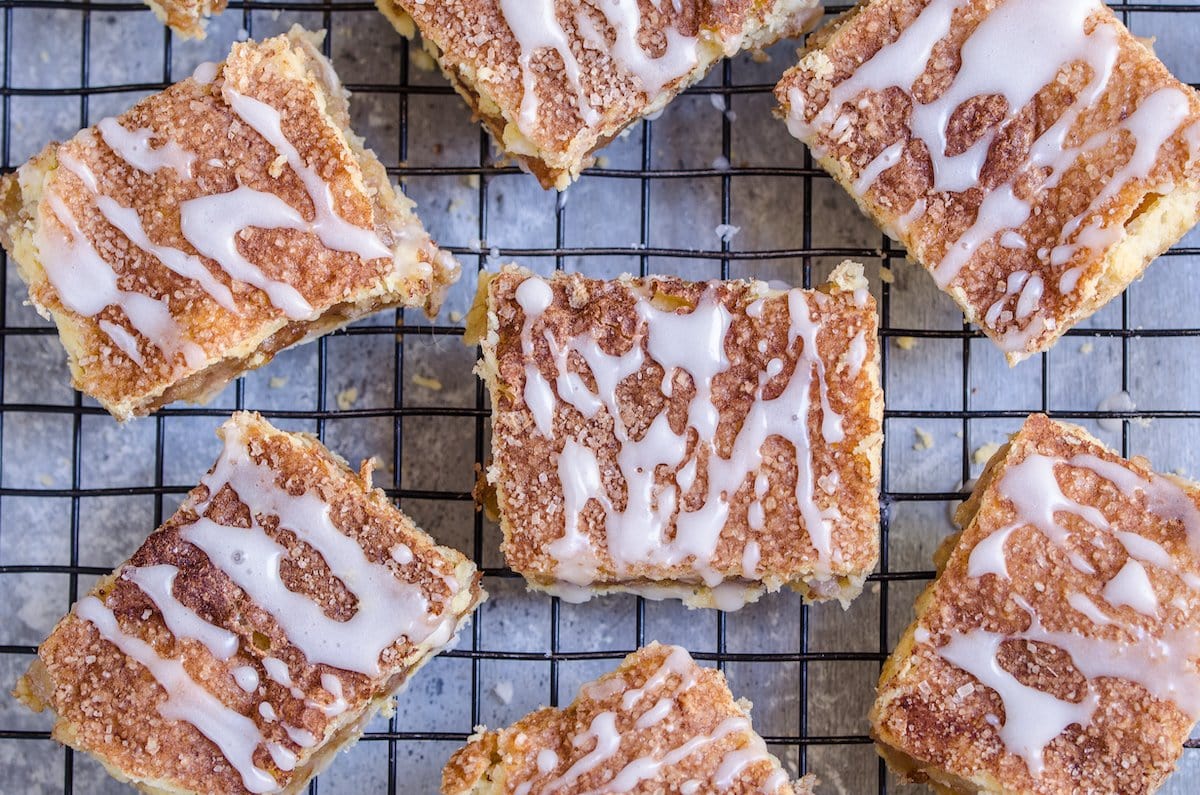
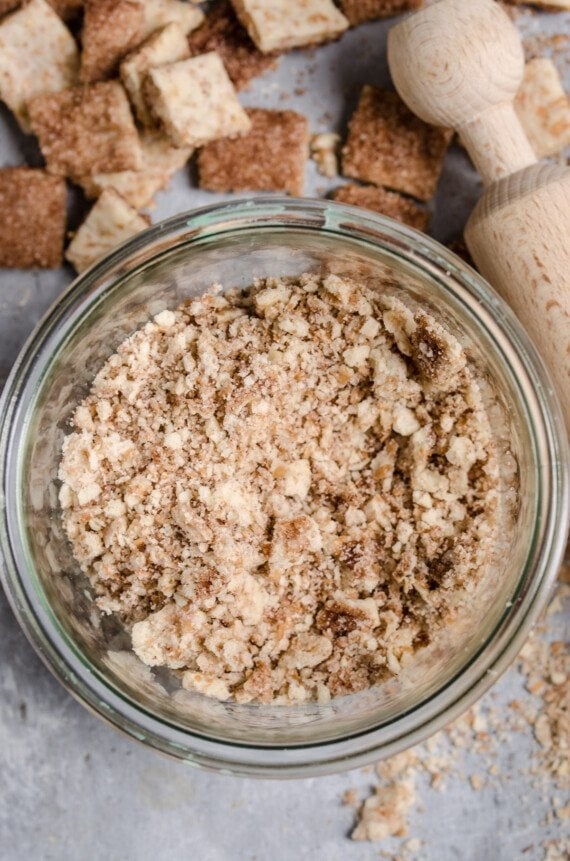
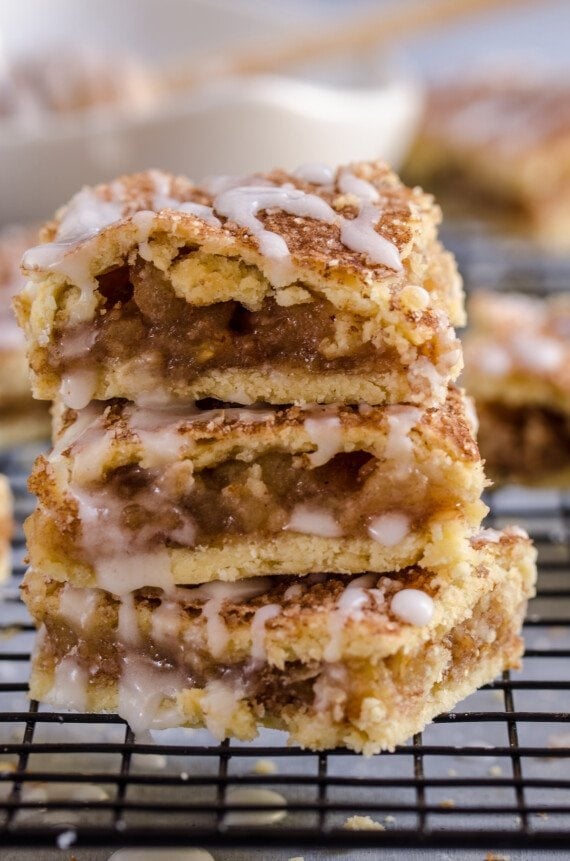
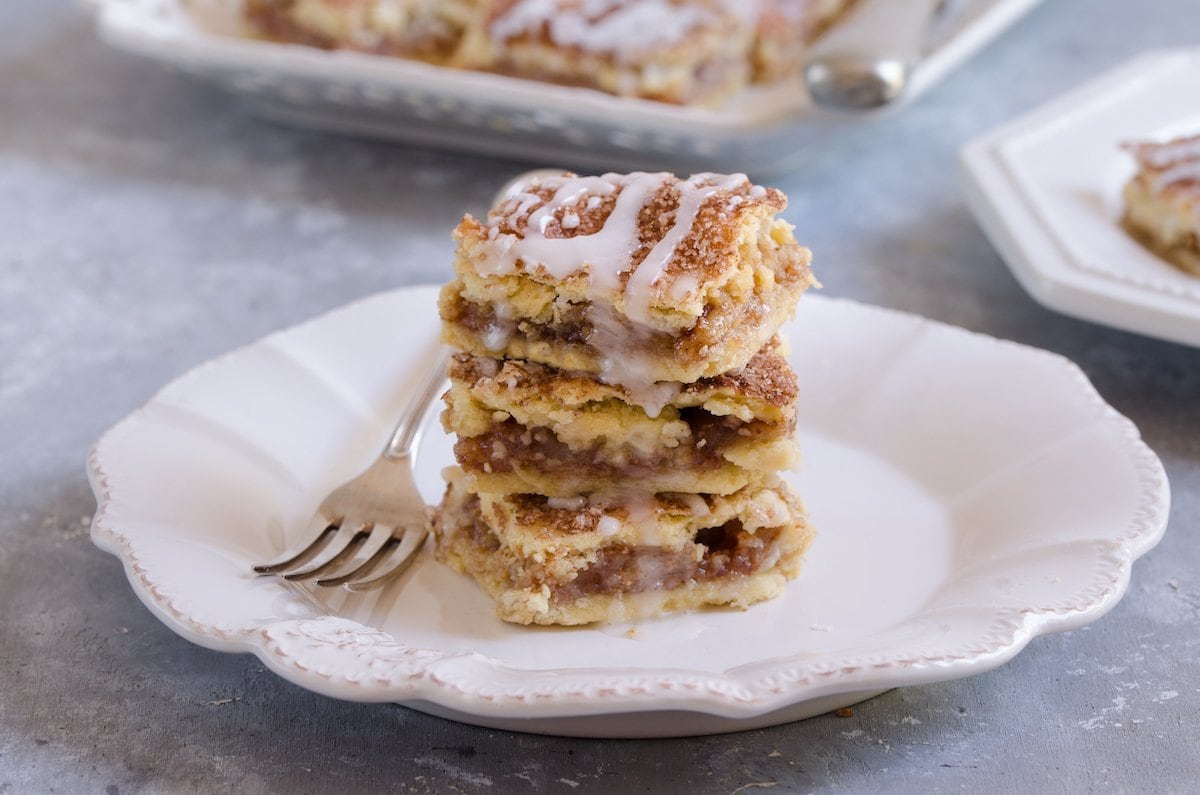
So, here’s the thing. I’m not usually a pie baker. I like my desserts to be quick and easy so I can get them into the oven/pan/fridge, and then into my belly, STAT. But, every once in a while I get a craving for buttery crust and a sugary sweet filling, and so we end up with something like these Apple Pie Bars. Bars are the perfect way to eat pie, in my opinion…you don’t have to get fussy with pretty lattice work, and that first slice is MUCH easier in square form! AND here the SECRET INGREDIENT…add in some extra cinnamon-y sweetness with crushed Cinnamon Toast Crunch cereal, and you have a winner of a recipe. i’m telling you, the Cinnamon Toast Crunch cereal adds a little something extra to the filling that really makes these bars delicious!
Why I Love These Apple Pie Bars
I feel like you’ve probably caught onto my apple pie bar excitement by this point, but I thought I would provide you with a few more reasons on why I love this recipe:
It’s Simple: No need to worry about creating a picture-perfect pie crust. No need to worry if the filling isn’t absolutely covered by the top layer of dough. I mean, you’re just going to chop this dessert into bars anyway! And the glaze will cover your mistakes! It’s all very low-stress.It’s Perfect for Fall: What says fall better than apples and cinnamon? Celebrating the beginning of fall with an individual apple pie sounds like a great idea. Use up those freshly-picked apples! (Also, if you’ve got fall get-togethers on the schedule, these bars are easily transported!)It’s Kid-Friendly: And adult-friendly, really! Who doesn’t love apple pie that you can eat with your hands? Finger food is always a hit. It also means less dishes to wash, my friends, and that is never a bad thing.
What You’ll Need
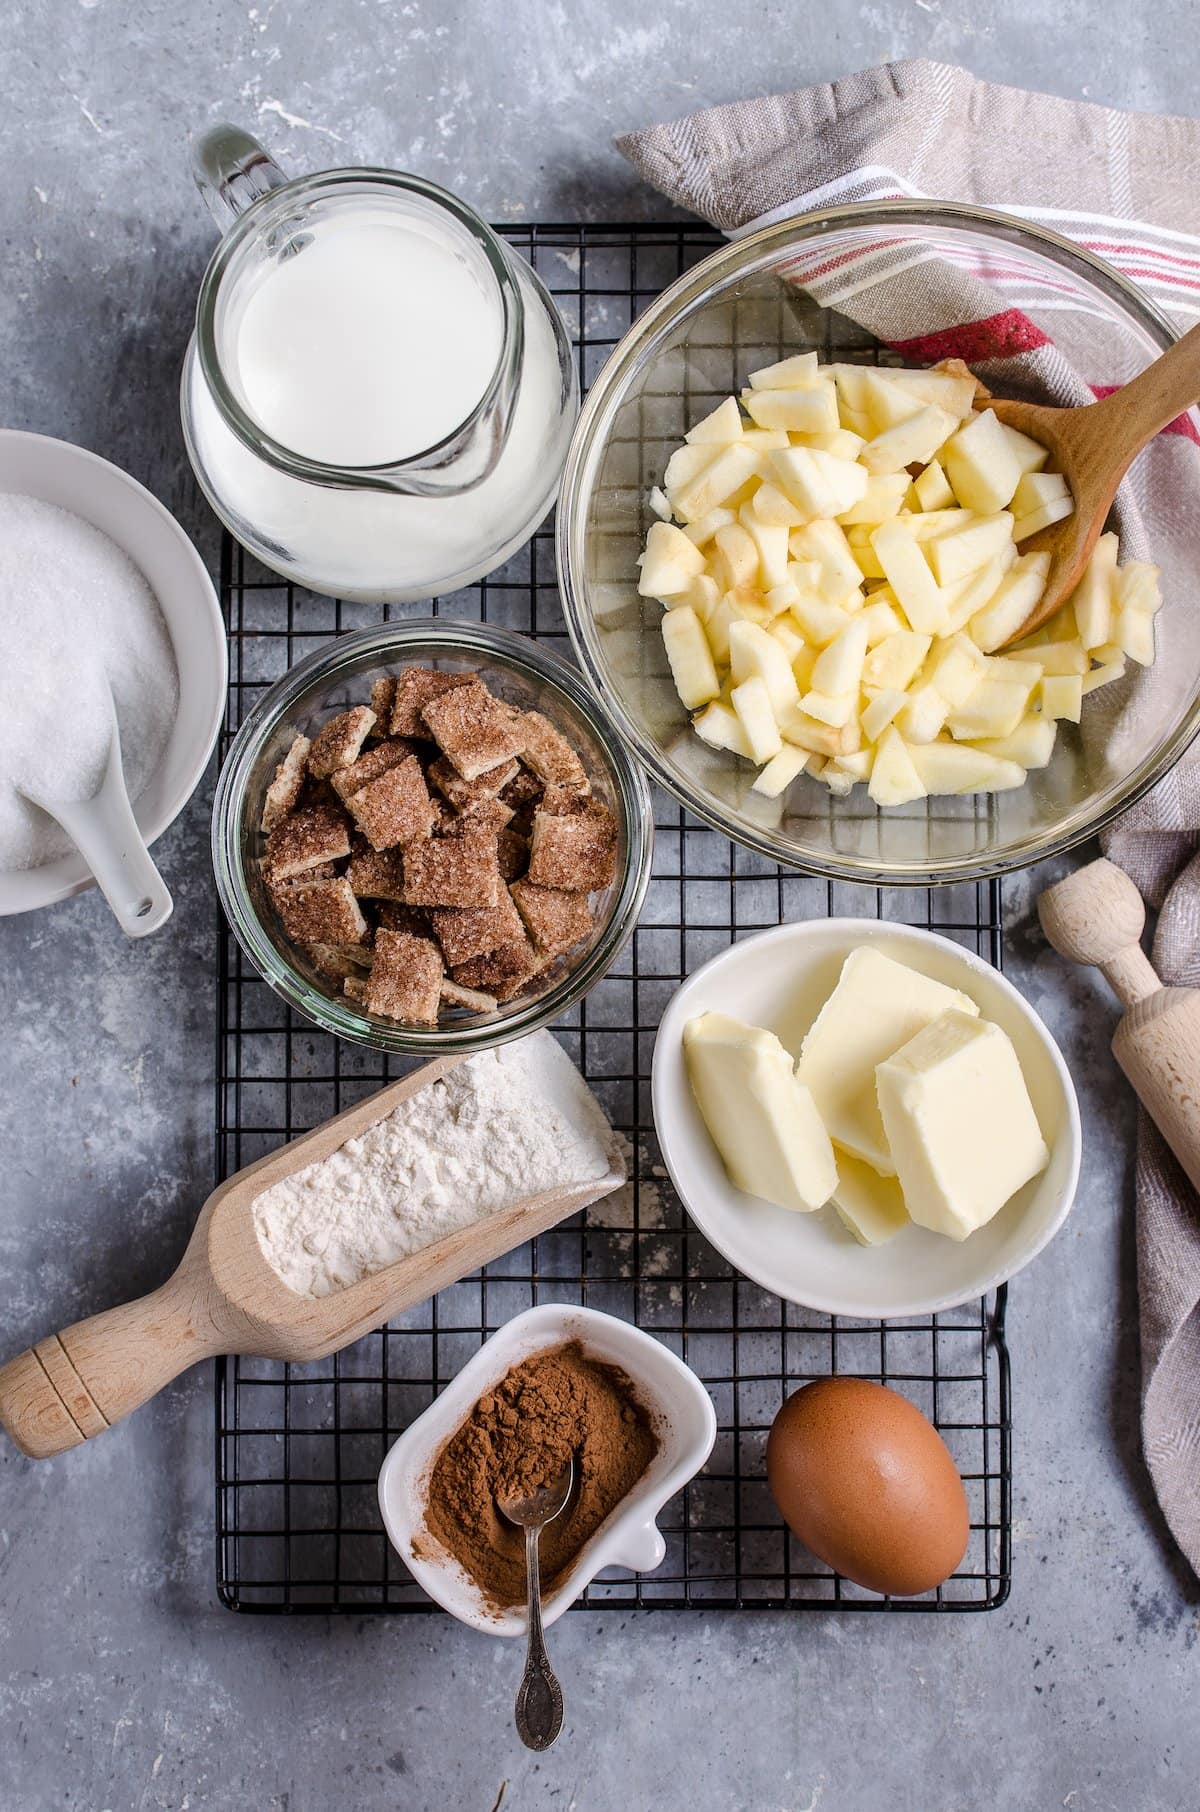
Okay, so the ingredients list is going to look a little long, but I promise it’s not that bad. These apple pie bars are so worth the somewhat crowded counter:
For the Crust
Flour: I used all-purpose flour for this recipe.Salt: To balance out/enhance the sweetness of the filling.Butter: Make sure the butter is cold, and not melted/softened.Egg: You’re going to need the yolk for the crust, but keep the egg white for later.Milk: I like to use whole milk for the crust.
For the Filling
Cinnamon Toast Crunch: If you’ve got another cinnamon-themed cereal that you’d like to use, that’s fine.Apples: I used Granny Smith apples because they’re the perfect level of tart, but Honey Crisps will work too.Cinnamon Sugar: Combine cinnamon and powdered sugar to make a simple cinnamon sugar mixture.
For the Topping
Egg White: From the previously mentioned egg.More Cinnamon Sugar: This time you can use cinnamon and granulated sugar because it adheres better to the outside of the dough.
For the Glaze
Powdered Sugar: Mix this carefully so that it doesn’t fly everywhere.Milk: You can use whole milk or 1-2% milk, whatever you prefer.
How to Make Apple Pie Bars
If you just looked at the recipe card and read the total time for these apple pie bars, you might be tempted to give them a miss. I know four hours sounds like a long time. But the prep work only takes about half an hour, so the rest of the time is basically waiting. So, while waiting is boring, it’s not labor-intensive, and that’s a win, right? Here’s how you put these apple dessert bars together:
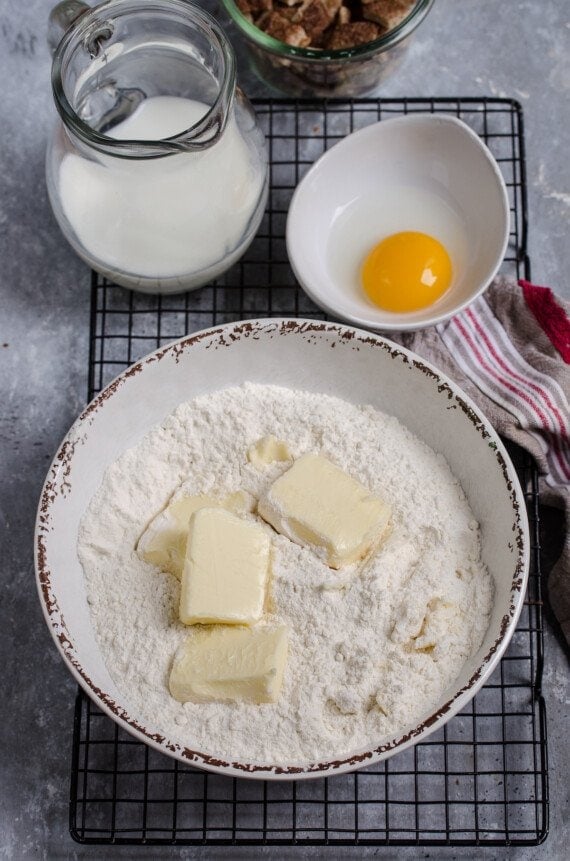
Make the Crust
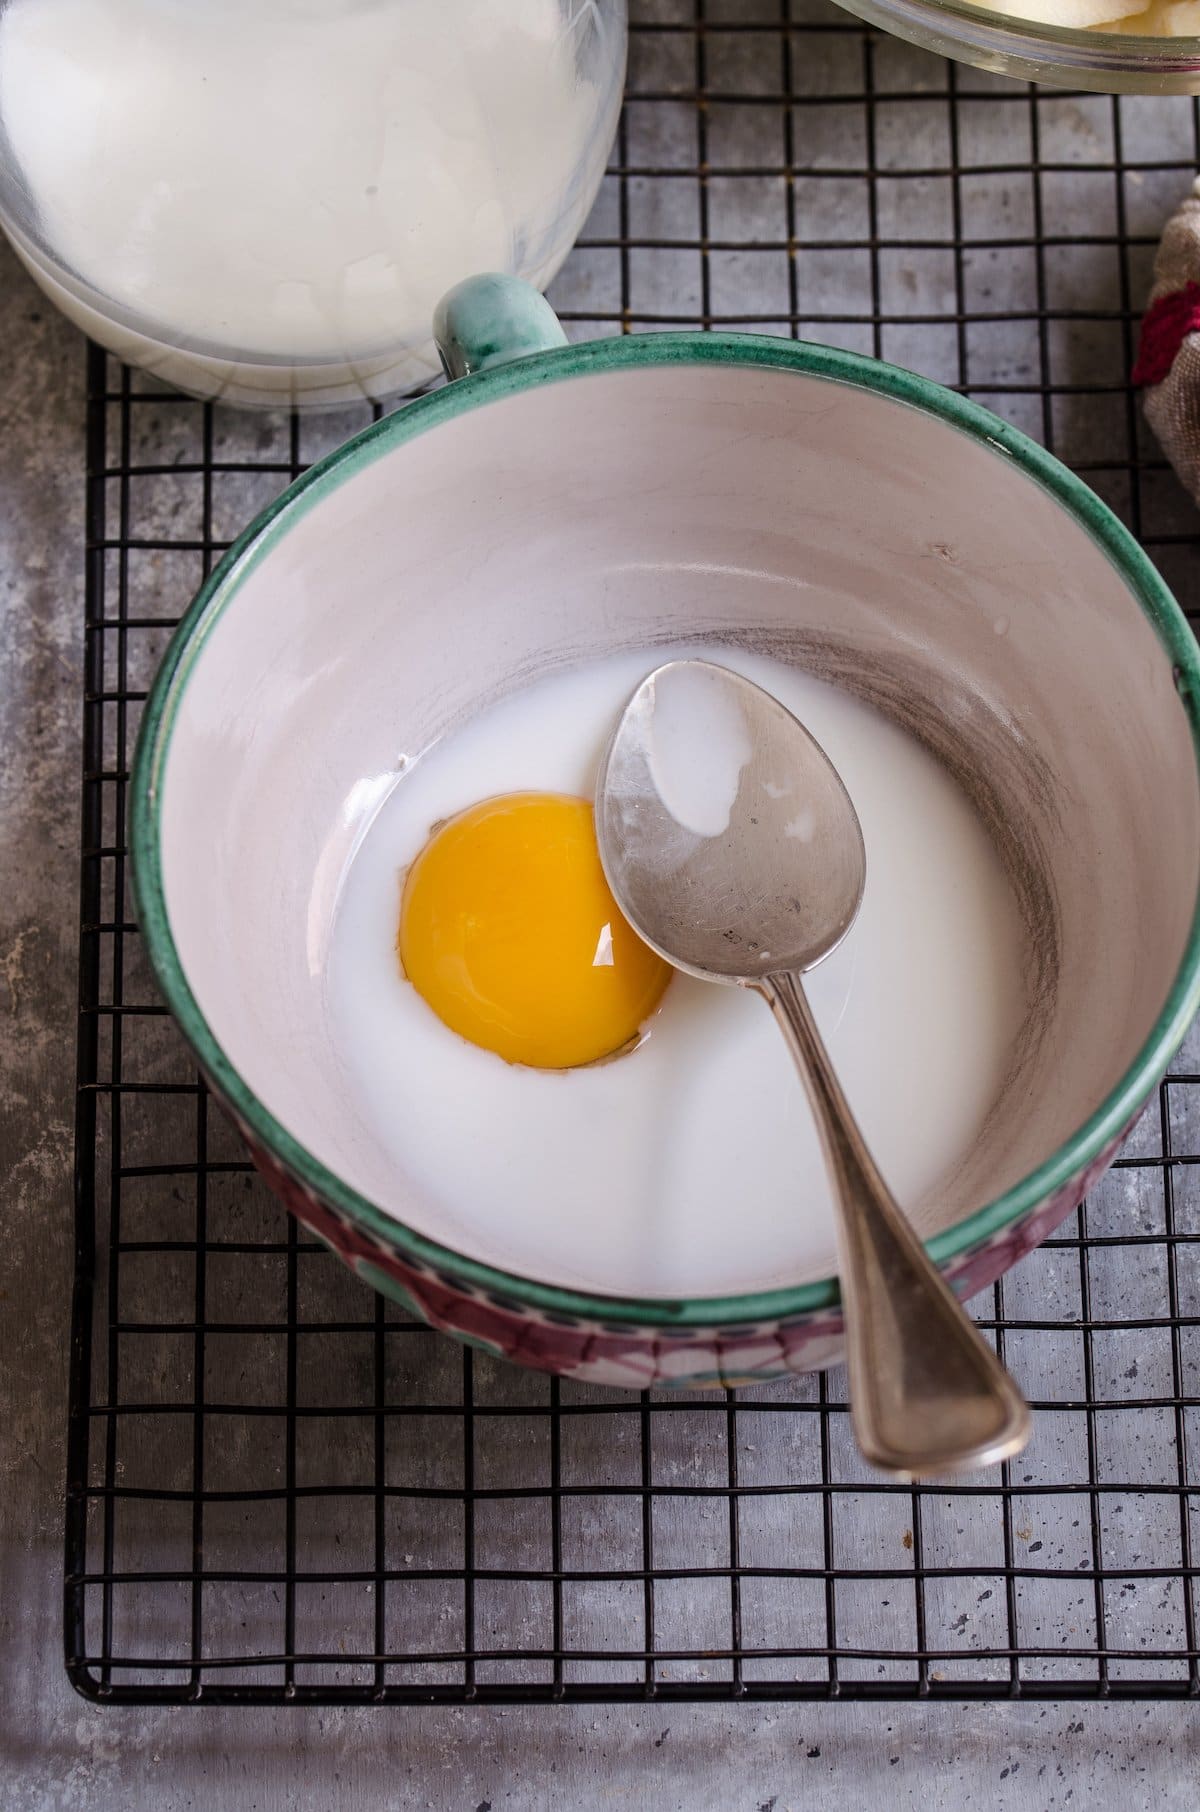
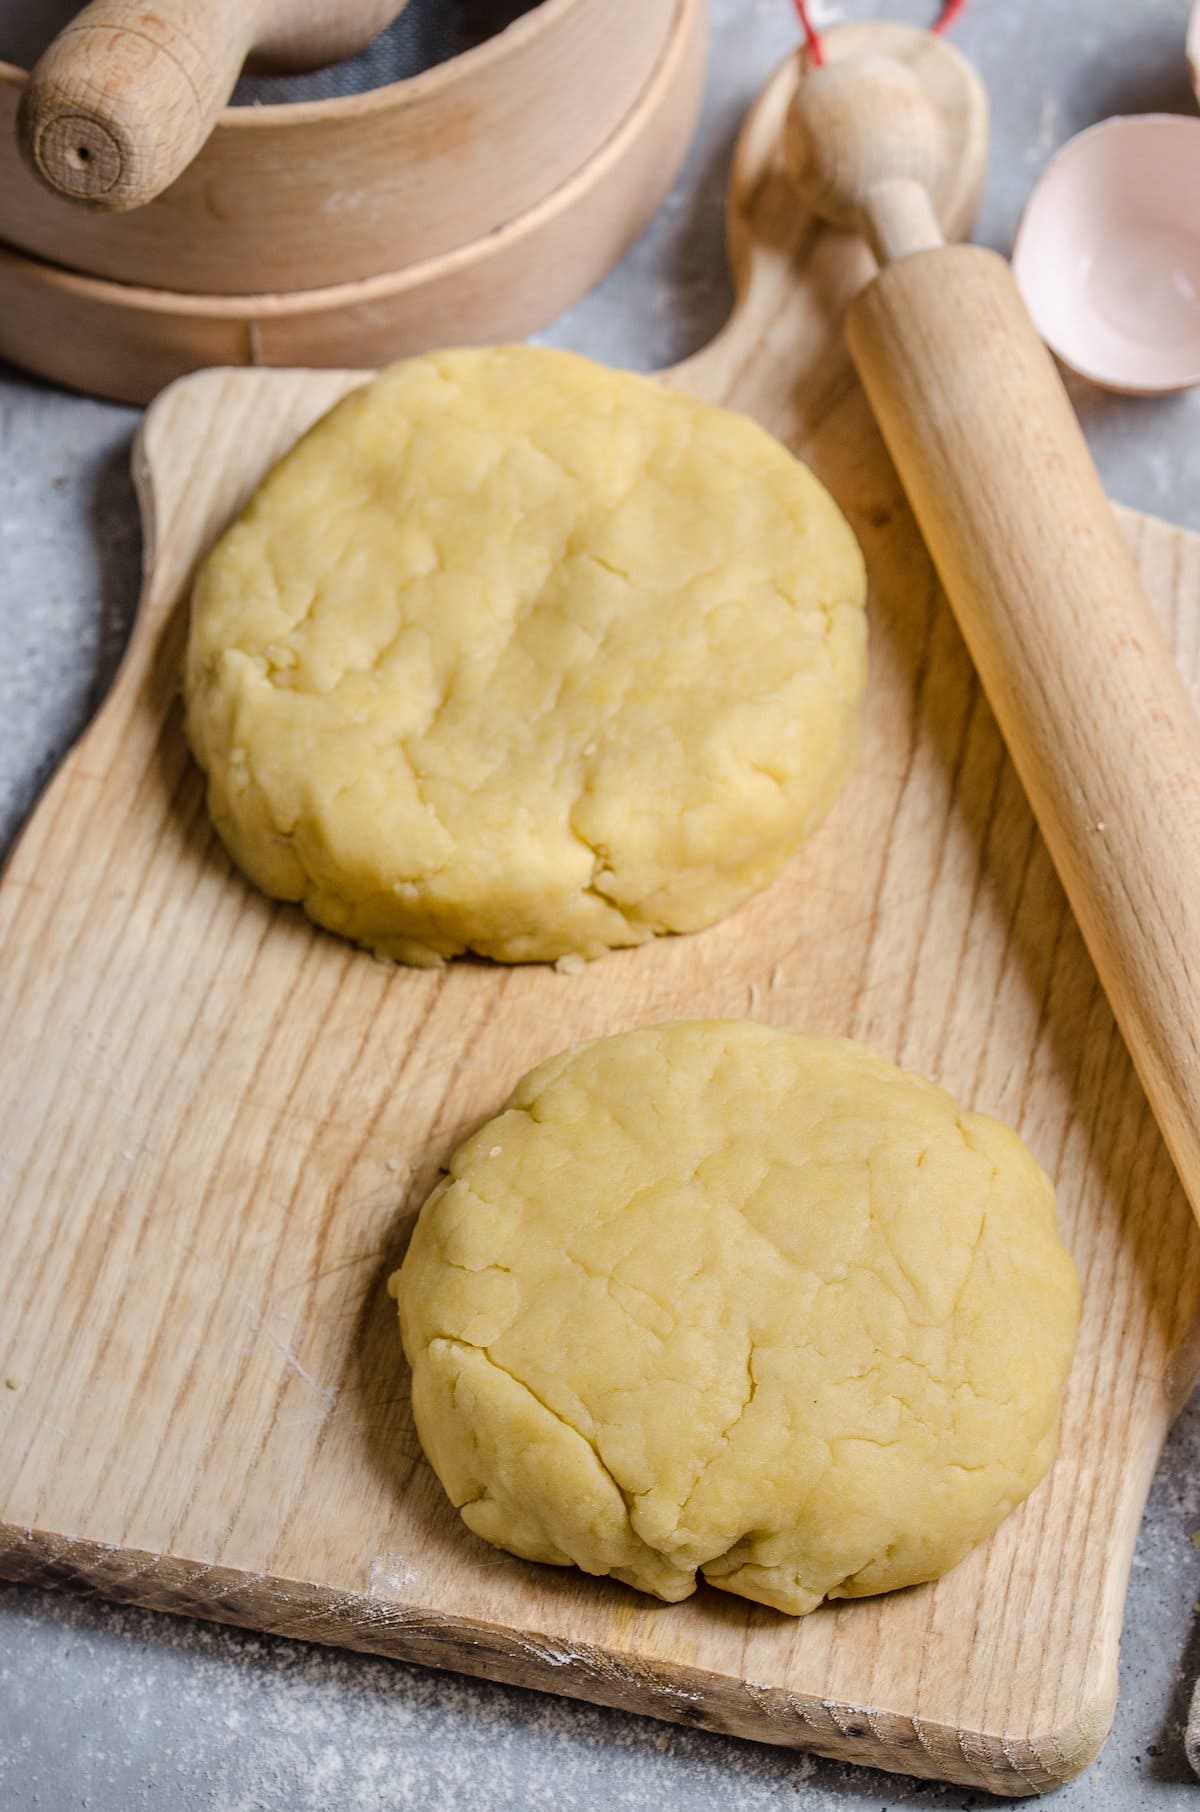
Mix the Flour, Salt, and Butter: In a medium bowl, combine the flour and salt. Next, add the butter. Using a pastry cutter, combine these three ingredients until the mixture becomes crumbly. Add the Egg Yolk: Lightly whisk the reserved egg yolk and add it to the milk. Pour the egg mix into the flour mix and, with your hands, combine to make a sticky dough. Form Disks of Dough: Divide the dough into 2 equal portions and flatten those into disks. Cover them with cling wrap and refrigerate for a minimum of 30 minutes.
Make the Filling
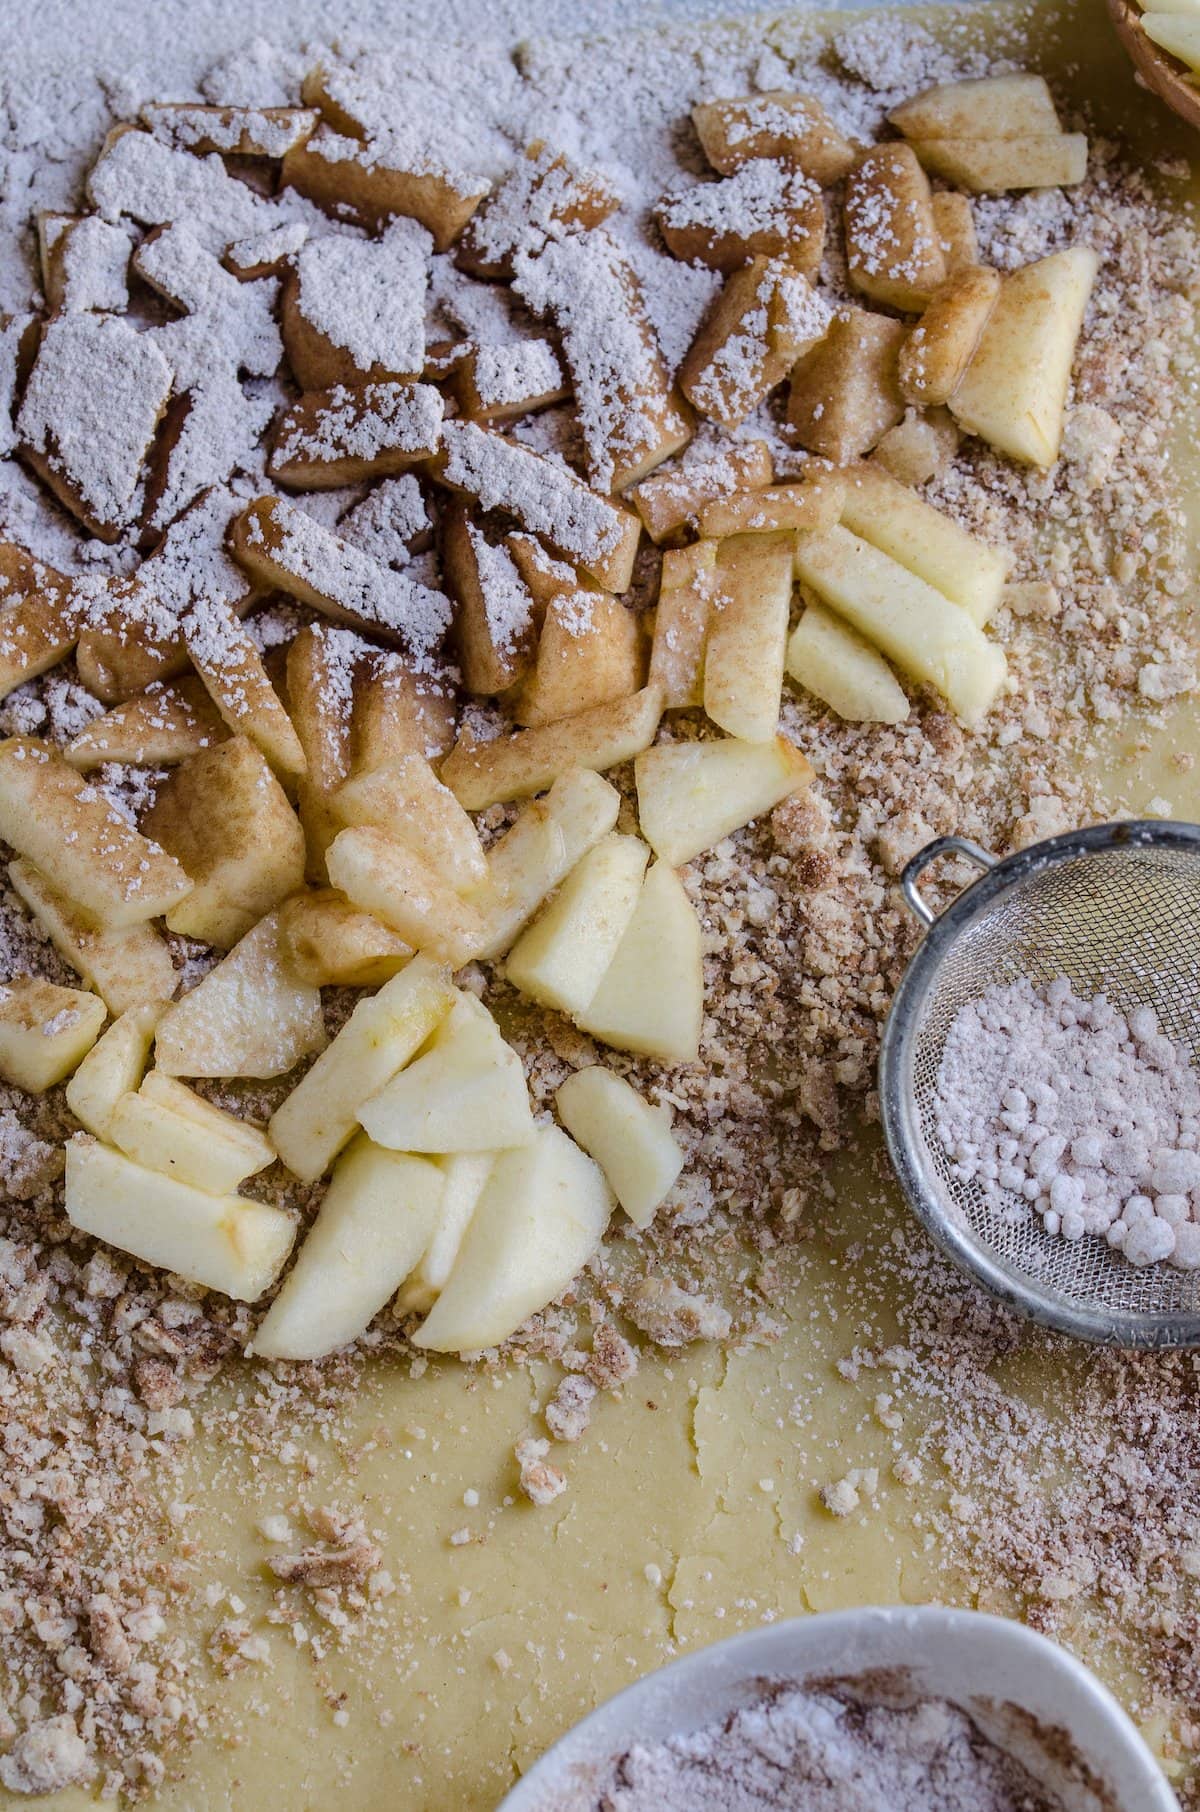
Heat the Oven to 350°F: Then crush the Cinnamon Toast Crunch into a fine crumb and peel and slice your apples into thin strips. Roll Out the Dough: Remove one chilled dough disc from refrigerator and, on a sheet of waxed paper, roll it into a 15 1/2″x10 1/2″ rectangle. Transfer the rectangle over to a jelly roll pan or a 10″x15″ glass pan with about 1/2″ of dough coming up the sides of the pan. Layer the Filling Ingredients onto the Dough: Pour your crushed Cinnamon Toast Crunch on top of dough. Then, spread your apples over that. Make the Cinnamon Sugar: Mix the powdered sugar and cinnamon in small bowl and sprinkle it on top of your apples. Roll Out the Rest of the Dough: Now remove your remaining dough from the refrigerator and roll it into a 10″x15″ rectangle. Place it on top of the apples and, using a fork or your fingers, seal the edges of dough.
Make the Topping
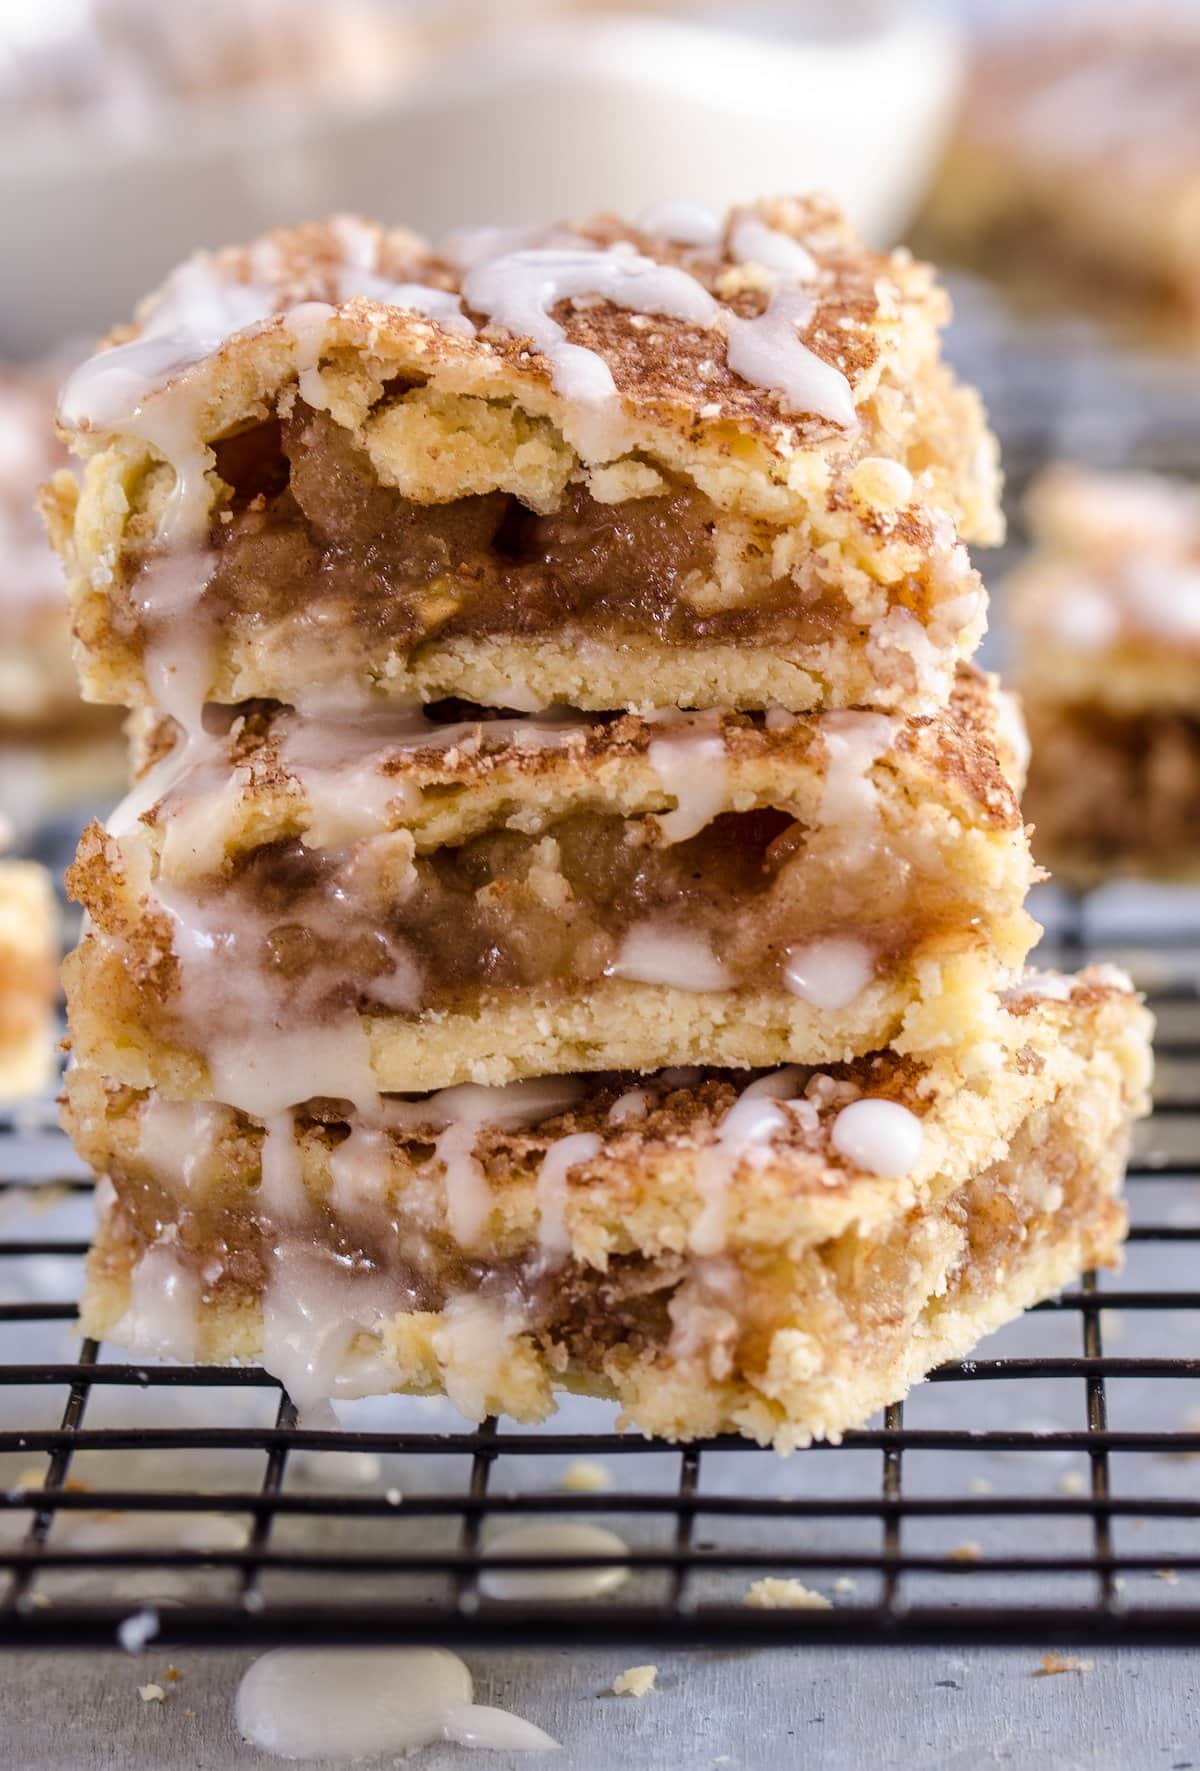
Whisk the Egg White: Whisk until it is foamy and then brush it on top of the dough. Mix Cinnamon and Sugar Again: Mix cinnamon and sugar in a small bowl and sprinkle it on top of the whisked egg. Bake the Bars: Bake in a preheated oven for approximately 45 minutes (until the pastry is lightly browned). Let it cool for 45 minutes to an hour.
Make the Glaze
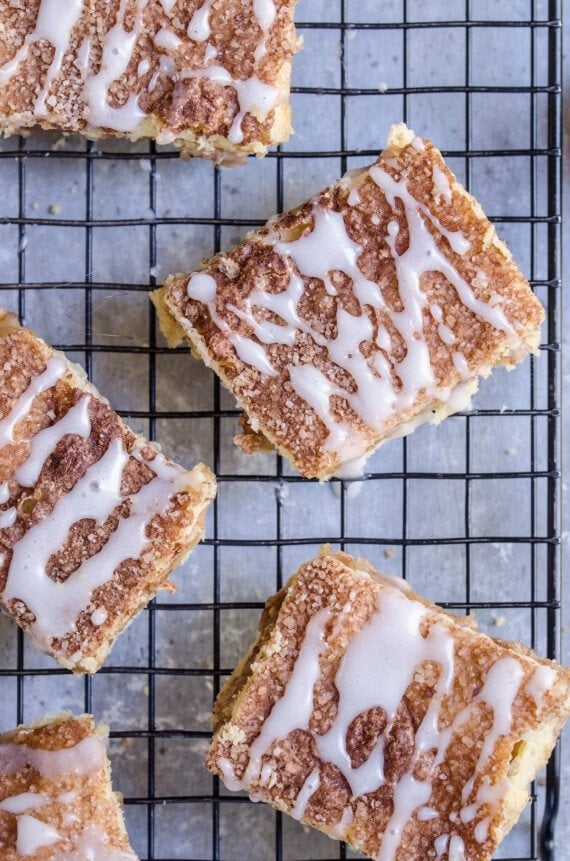
Mix the 2 Ingredients: Mix the powdered sugar and milk together until smooth. Drizzle the glaze over the top of the crust. Let it cool for 2 hours, until completely set, and cut your bars!
Tips for Success
That was a lot. But you’ve got this! Keep those fresh-from-the-oven, sweet apple pie bars in mind! Here are some extra tips on how to get the best results with your bars:
Chill the Bars After Adding Glaze: If you cut into them immediately the glaze will go everywhere and it will be a mess. A delicious mess, but a mess nonetheless. Wait a couple hours and it will firm up beautifully!When Are the Bars Done? They should be a light golden brown, and the sides should be just firm. Start checking on them in the last 5 minutes, though, so they don’t burn!Customize the Filling: Feel free to add chopped walnuts, chopped pecans, some extra cinnamon, brown sugar, etc.!Serve with Ice Cream: Apple pie is always better with a scoop of vanilla ice cream, and so are these pie bars.
How to Store and Reheat Leftovers
Store your apple pie bars covered in the refrigerator for 4-5 days. If you want to reheat them, simply pop them in the microwave for 15-30 seconds. You could also warm them in the oven if you like.
Can I Freeze These?
These glazed pie bars don’t generally last too long in my house, so I haven’t tried this, but I think you could freeze them for 1-2 months in an airtight container (between layers of parchment paper, once totally cooled). Just make sure to thaw them overnight in the fridge before eating again.
More Apple Dessert Ideas
Looking for more easy apple dessert recipes? Check out these ones:
You’ll also sign up to get new recipes in your inbox. Δ
Apple Fritter BreadDutch Apple PieApple Crisp TriflesCaramel Apple Cheesecake BarsApple Strudel
PIN for later: