Are you a cheeseburger fan? Make sure to try my Cheeseburger Soup recipe too!
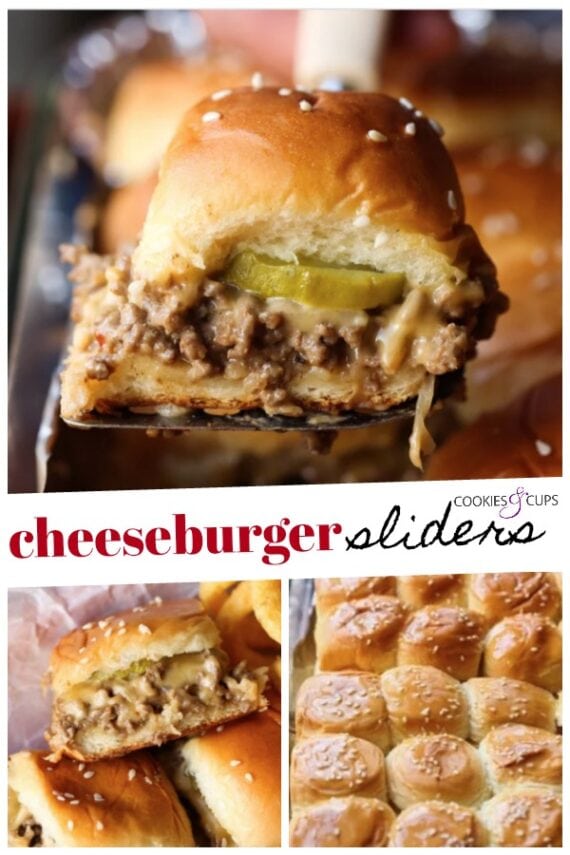
Cheeseburger Sliders Are The Perfect Party Food!
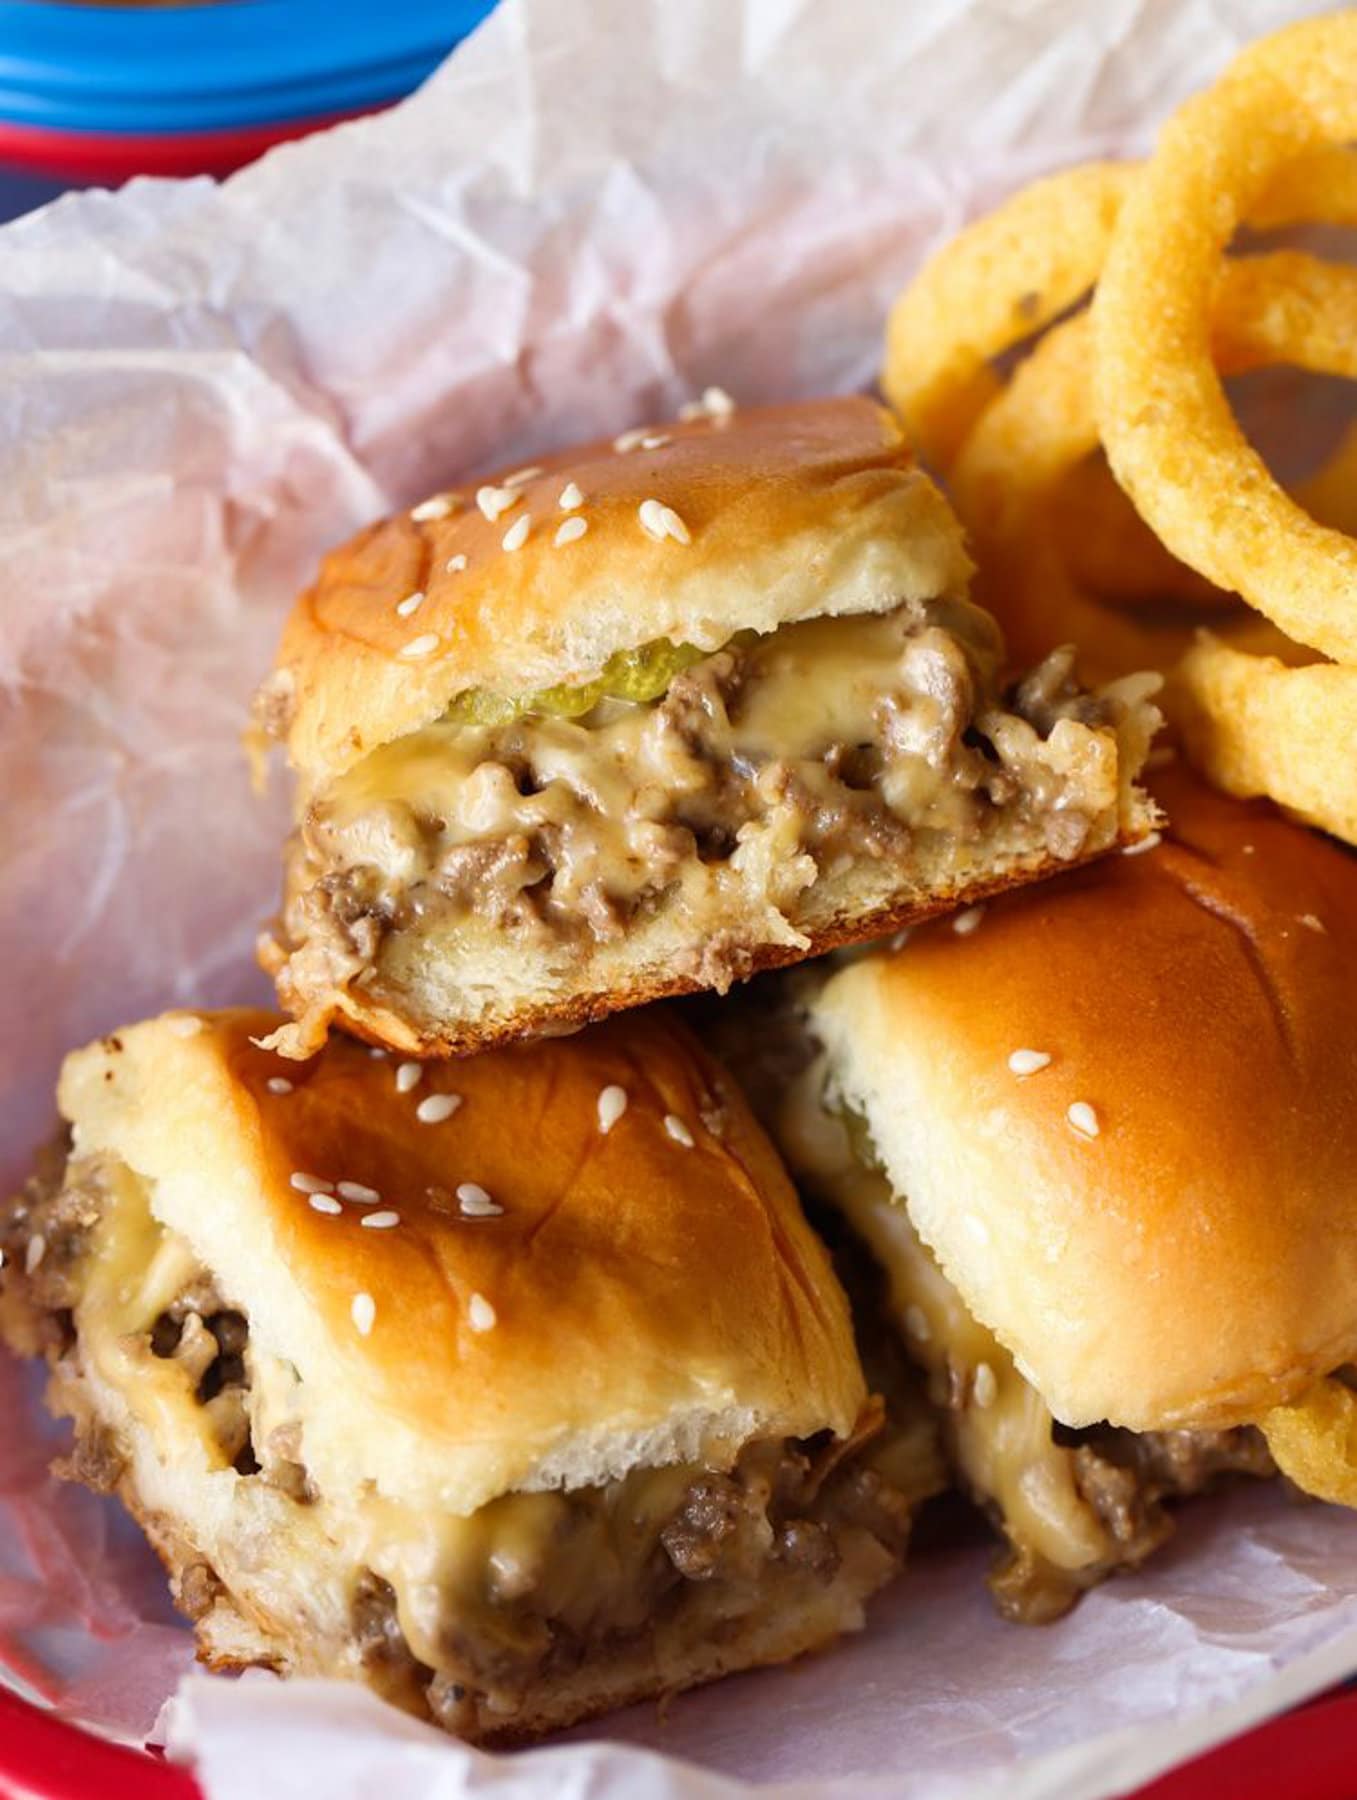
I am always looking for easy party food. We love getting together with our friends for drinks or by the pool in the summer, and snacks are always necessary. Plus, I have boys who always have friends at the house, and this sliders recipe is PERFECT to feed hungry kids! The fact that these cheeseburger sliders taste almost exactly like White Castles is a bonus. And of course, since these are homemade they’re way better! Serve them with a side of onion rings or french fries and you’ll have a true fast food experience at home!
This Sliders Recipe is Made Easy with Ground Beef!
The best part of this slider recipe, is you don’t have to form individual meat patties! This saves a ton of time, which is why they are so great for parties! I definitely recommend using lean ground beef so there is less fat to drain from the skillet. If you don’t drain this well you will end up with soggy sliders, and that’s not fun. Using ground beef also makes seasoning the meat much easier, because once it’s cooked you can adjust the seasoning to suit your taste! Kind of like a cheeseburger sloppy joe!
Ingredients You Will Need:
The full ingredient list with all the measurements can be found at the bottom of this post in the printable recipe card.
Slider Rolls: I like King’s Hawaiian brand. The Sauce: Mayonnaise, Ketchup, Yellow Mustard The Meat: Lean ground beef, a yellow onion, dry french onion soup mix, steak seasoning (like Montreal’s) Toppings: American cheese slices, dill pickle slices, sesame seeds
How To Make Cheeseburger Sliders:
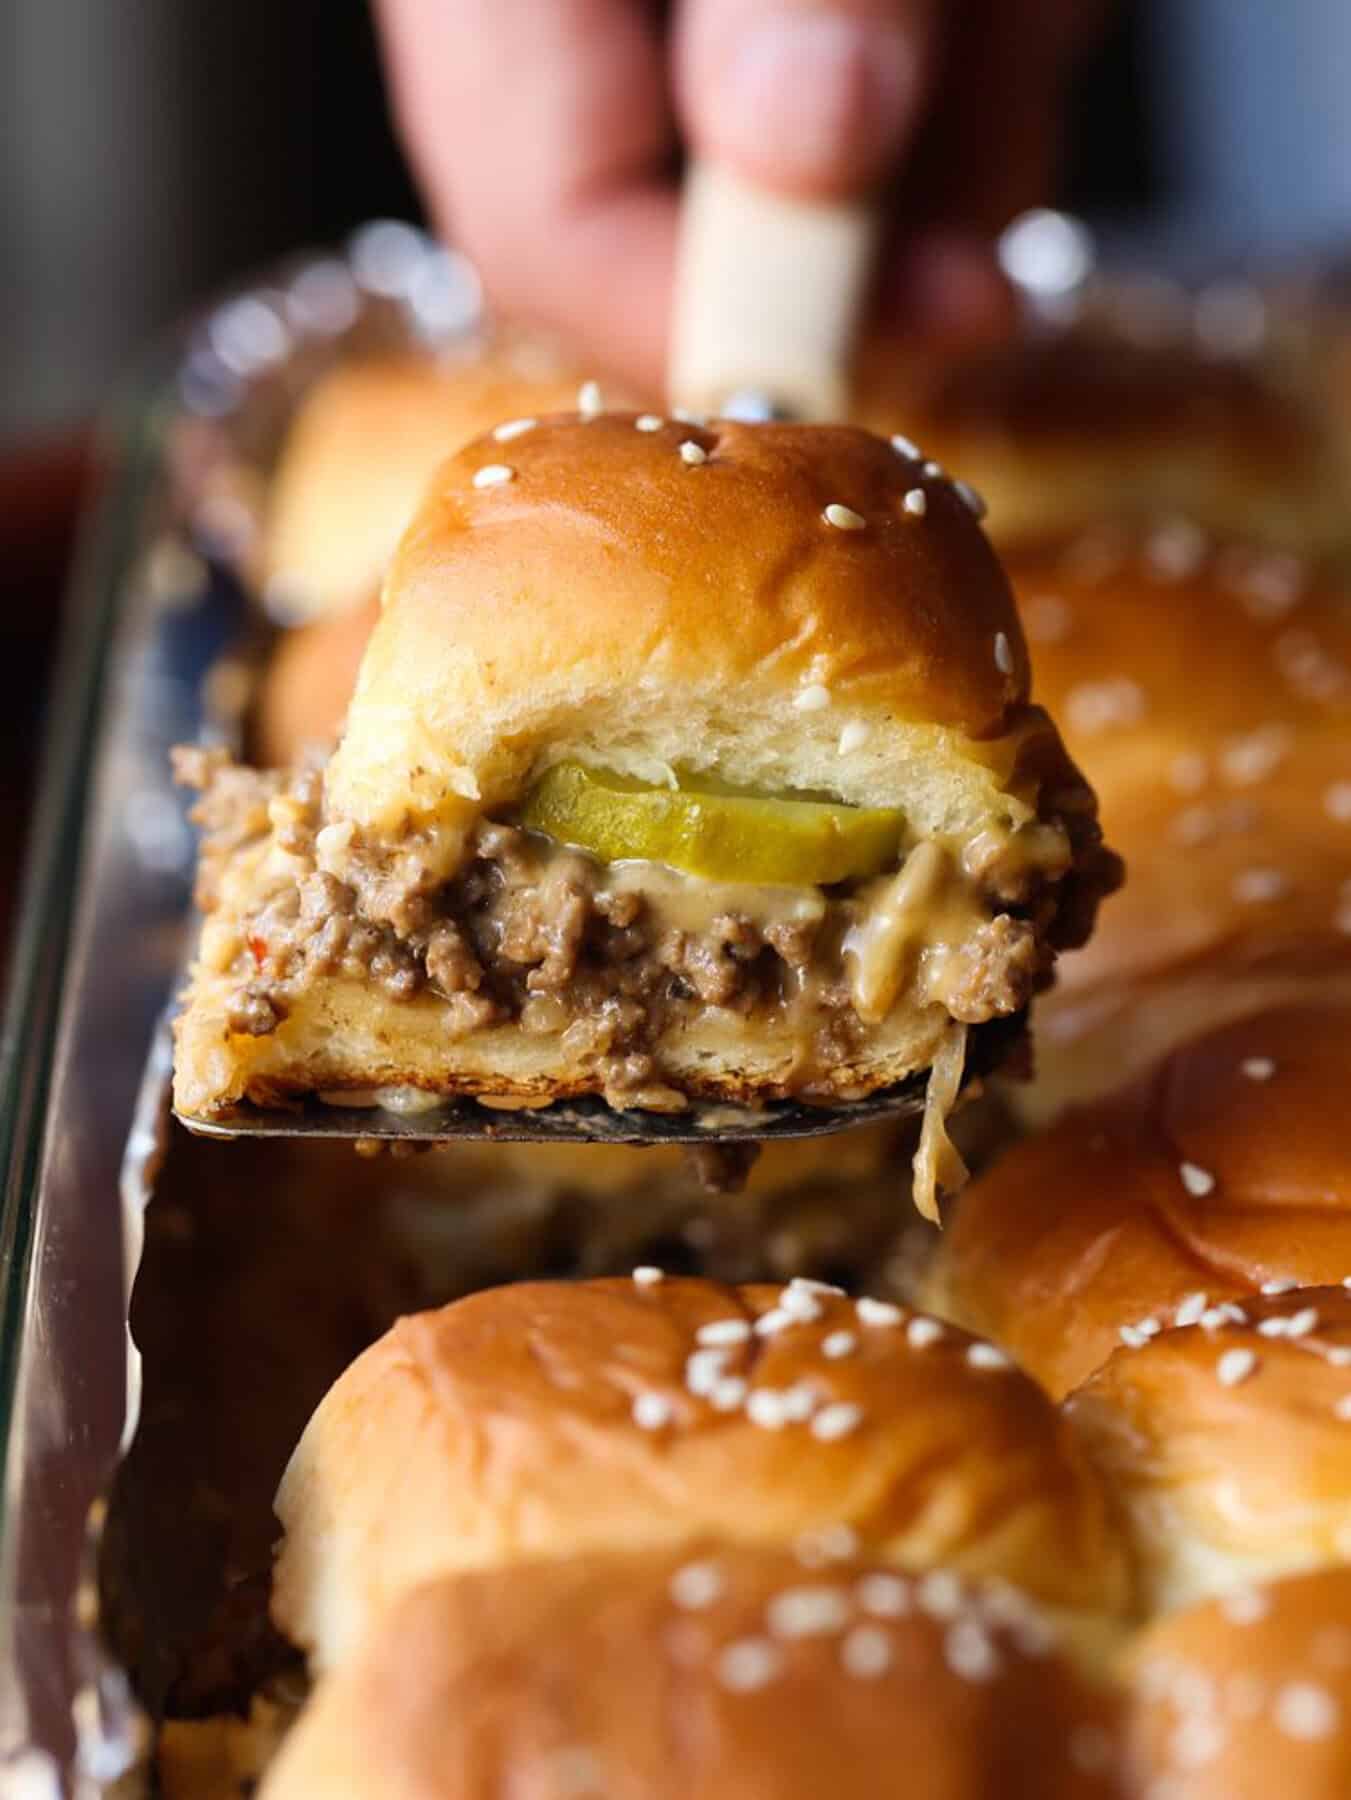
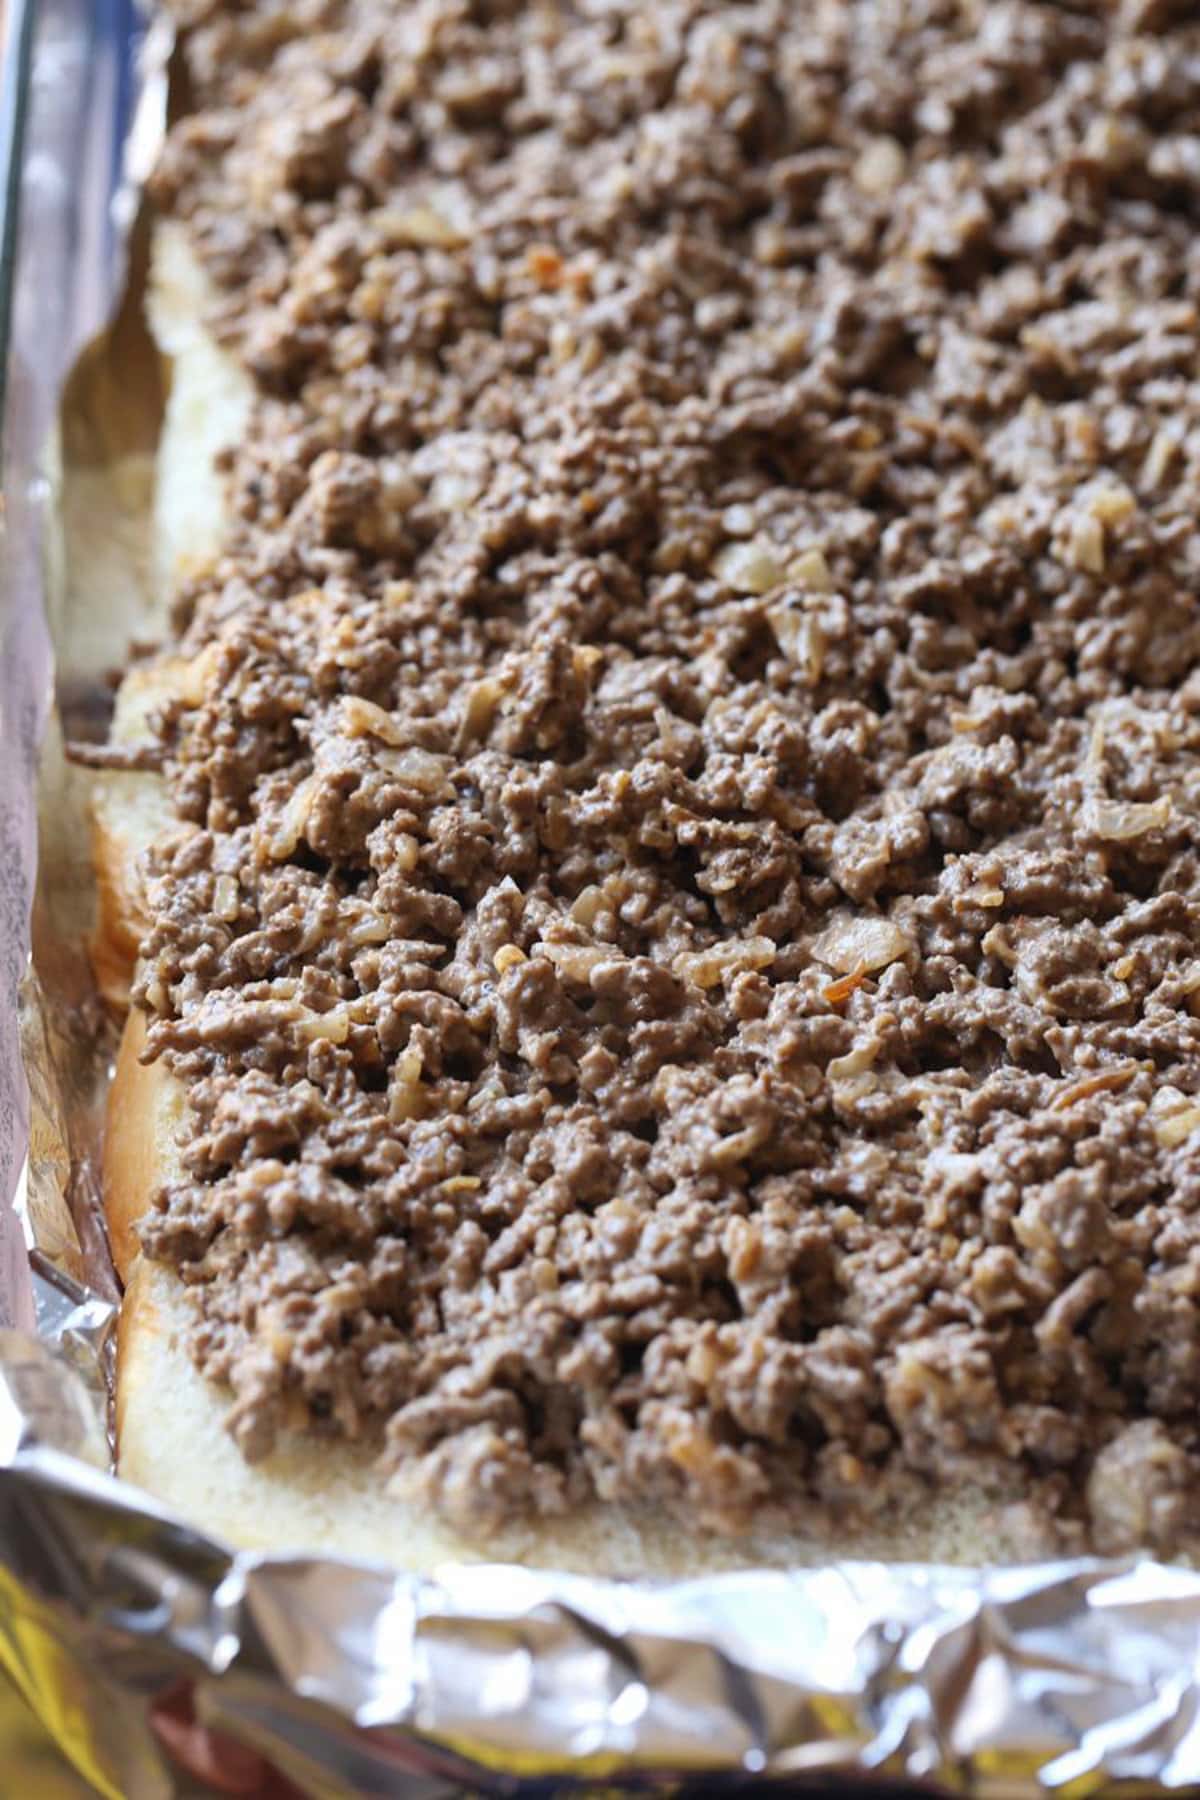
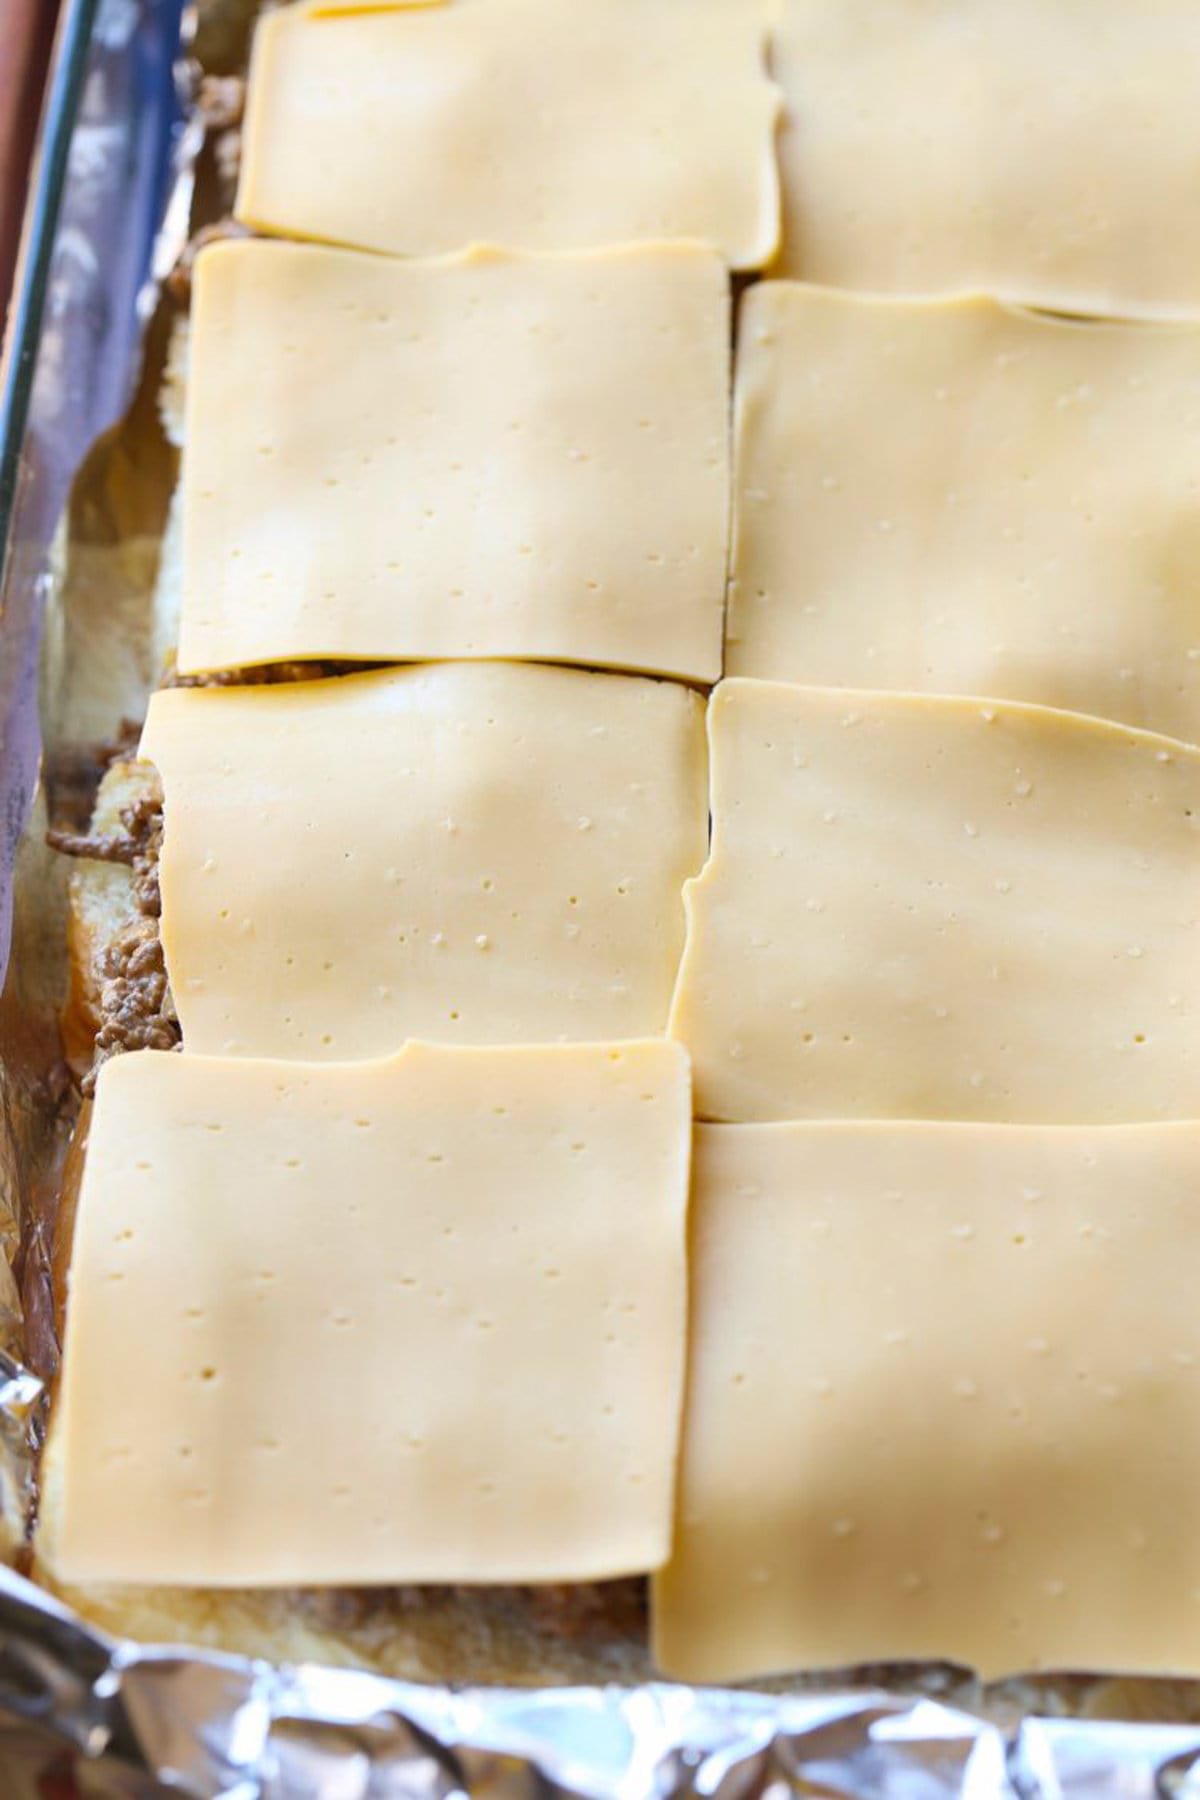
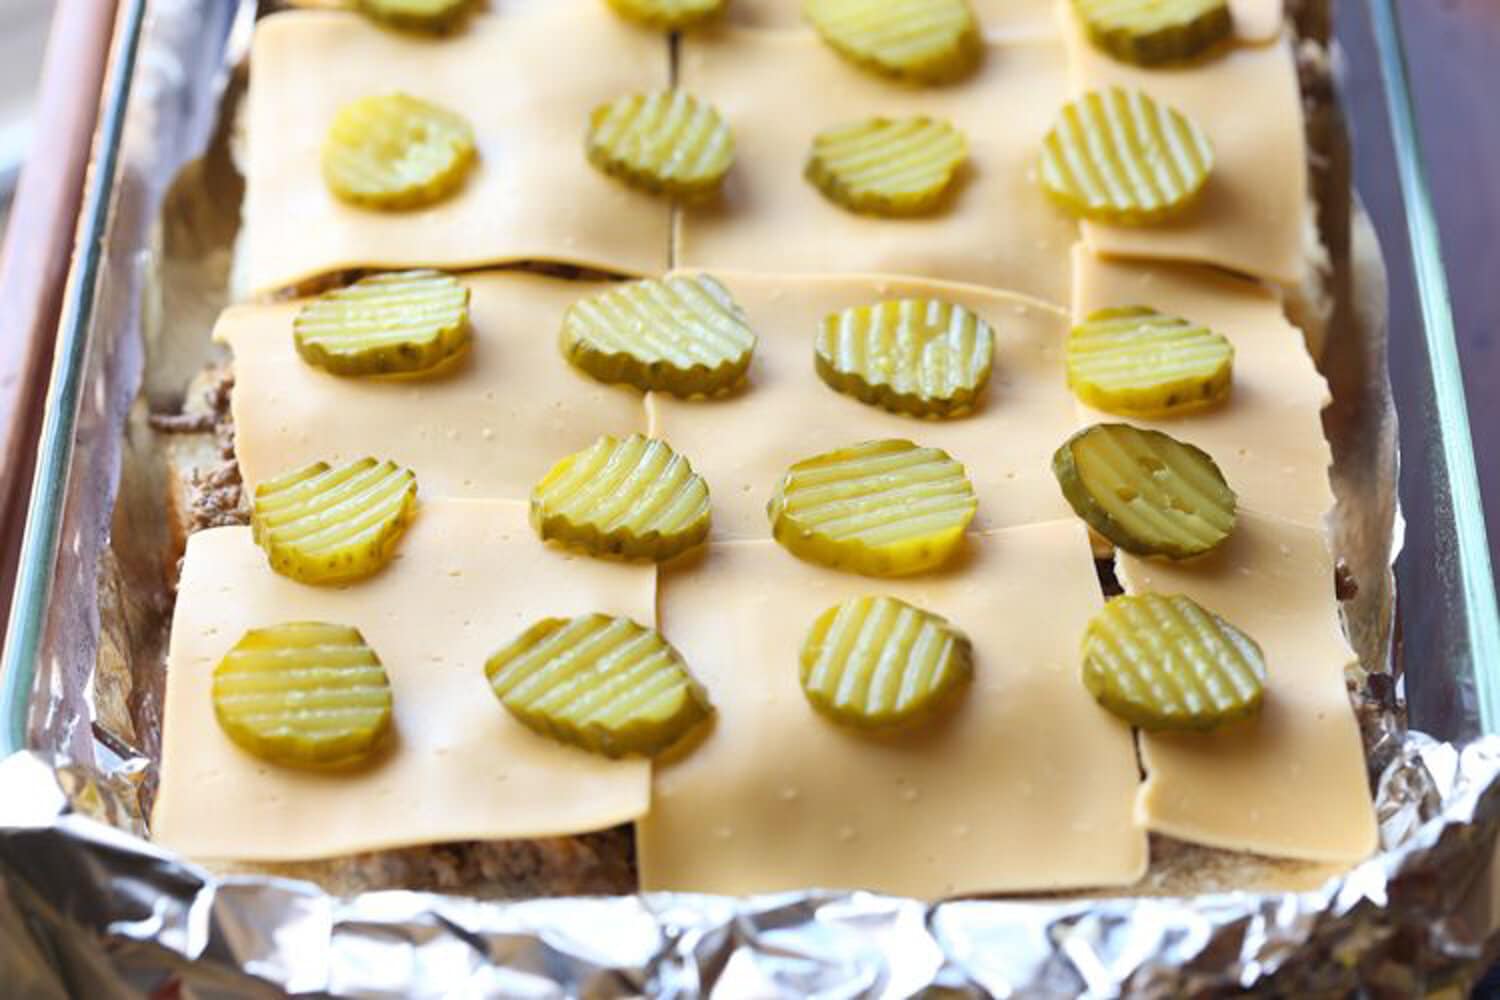
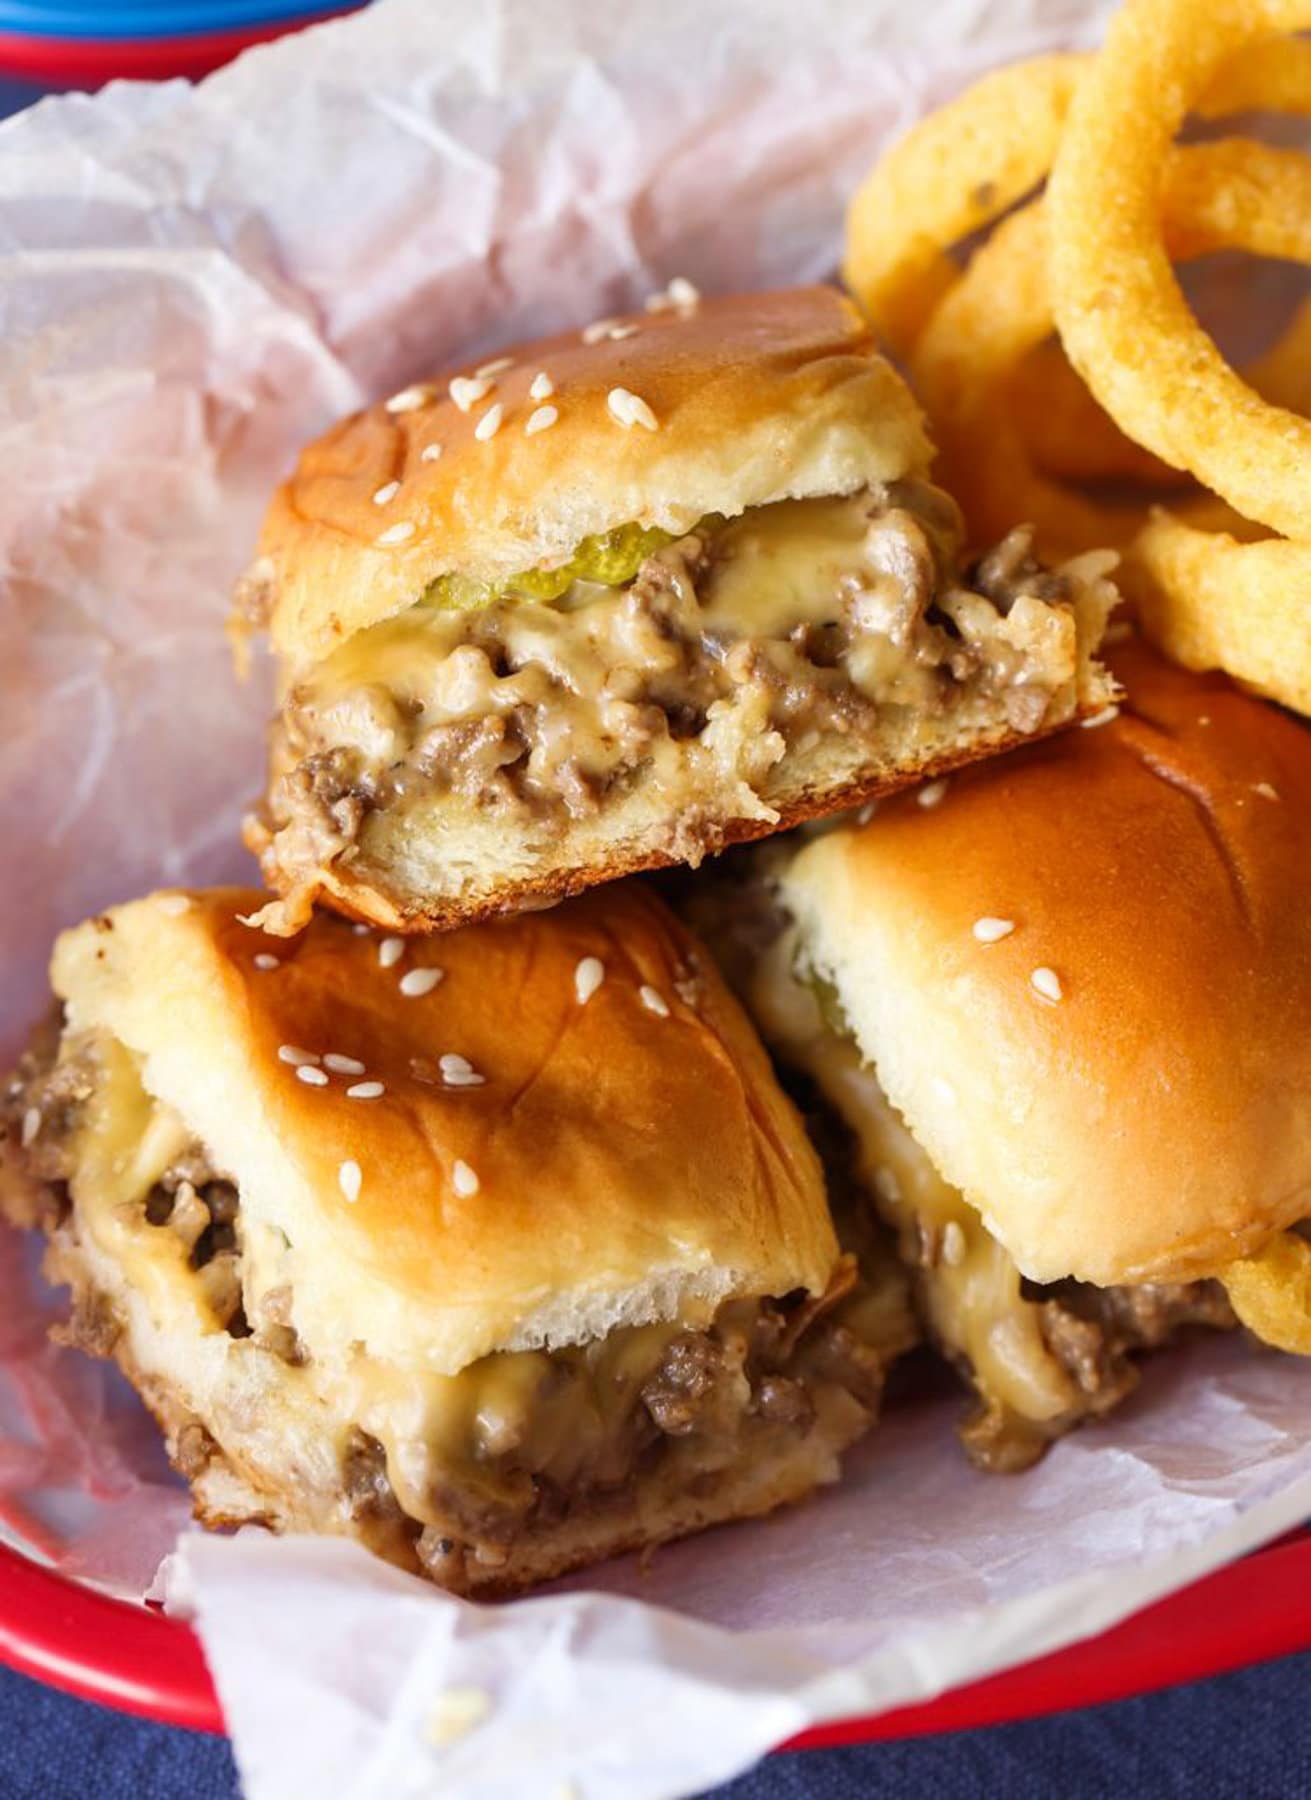
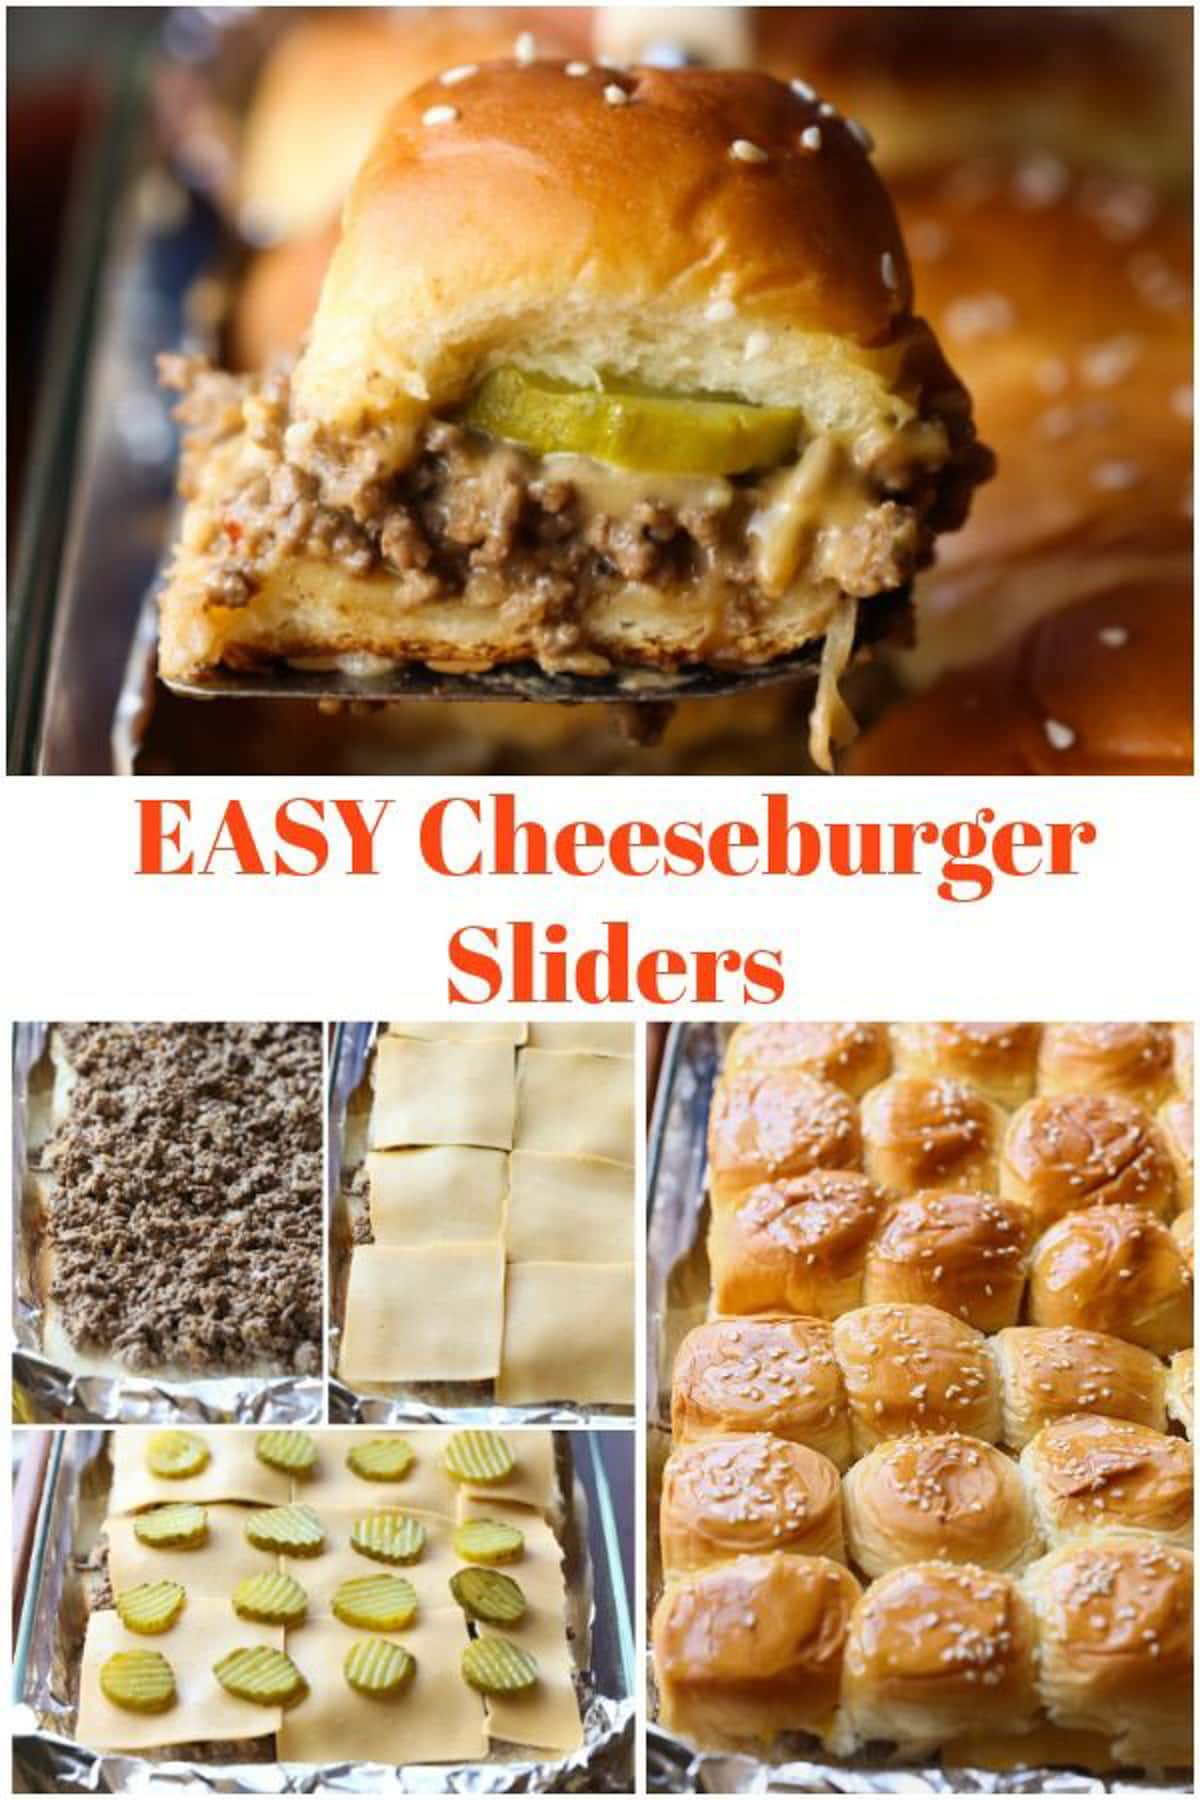
Prep the pan: You will need a large baking dish for this recipe, like a roasting pan that is 11-15- inches. Line the pan with parchment paper or aluminum foil to make for easy clean up. Coat it lightly with nonstick spray and set aside. Next, slice the slider rolls in half using a serrated knife. Place the bottoms of the sliders evenly into the baking dish and set the tops of the buns aside for now. Prep the sauce: In a small bowl, whisk together the mayonnaise, ketchup, and mustard and set that aside. Cook the meat: In a large skillet heat some olive oil and add in diced onions. Cook the onions until they are soft and golden in color. I prefer my onions to have no crunch, but if you like a little crunch you can cook them less. Then add in the ground beef and cook that all the way through. Drain any excess liquid and add in the onion soup mix and steak seasoning. Spread the meat on top of the buns and then top the meat with your cheese slices. You might need to cut them to fit, like cheeseburger tetris lol. Then, the most important part of the whole burger in my opinion…the pickles. We all know the pickle bite is the best. Now press those bun tops on top! Brush the whole situation with melted butter and then sprinkle on some sesame seeds. Cover that tightly with aluminum foil and bake them for 15- ish minutes at 350°F. When they come out of the oven leave the foil on top for 5 – 10 minutes. This holds the heat in and creates a little steam, so the texture is just like White Castle!
Tips For Making Cheeseburger Sliders:
Let me walk you through the assembly process for these Cheeseburger Sliders. The process only takes a few minutes, but there are a few tricks to make these perfect!
Can You Prep This Sliders Recipe Ahead?
This is a great recipe to serve a crowd, and yes can even assemble them ahead of time! Just prepare the sliders according to the recipe, cover and refrigerate until ready to bake! I would recommend removing them from the fridge 20-30 minutes before baking to take the chill off. Then bake them according to the recipe instructions, adding a few extra minutes because they will be cool.
Looking for more sliders recipes? Try These:
Chicken Parm Sliders Breakfast Sliders Philly Cheesesteak Sliders
PIN for later:
You’ll also sign up to get new recipes in your inbox. Δ *Note – by placing the baking dish on a cookie sheet if helps the bottoms of the slider buns from getting crunchy, by creating a barrier. Also place the baking sheet on the middle rack in the oven, so it’s not too clse to the bottom burner!